You can create your own view filters by adding tags to a product list.
Use custom filters to organize SKU's into groups. For example to focus on fast runners, new product introductions, a specific product category or product model name.
To create custom filters you first:
- Create a product list and fill out the mandatory fields (column A - E)
- Fill out the optional product tags (Column F-Y) to create custom view filters. Add multiple tag-values/variants in 1 cell, by separating them with a pipe-symbol "|".
- Add for instance: Product categories, Model names or Product lifecycle stages. Use the "|" if a product falls under several categories etc.
Example:
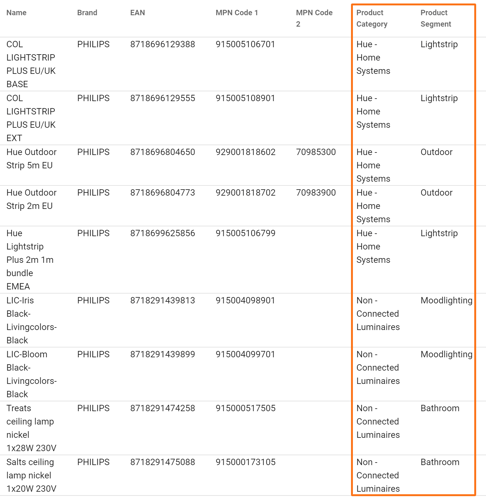
To add a custom view filter 'Product Category' and 'Product Segment' you take the following steps:
- Create a product list and fill out the mandatory fields (column A - E)
- Add product tags in Column F and G, named: 'Product Category' and 'Product Segment'.
- Fill in the corresponding values for each product.
- Upload your product list.
- It can take up to 60 minutes before you see the product tags back in (or removed from) the filter menu.
- The tag(s) and its unique value(s) will appear as a view filter in each dashboard.
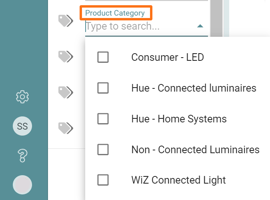
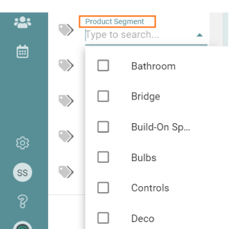
- Now you can select and apply your new custom filter to a dashboard view.
Common issues with custom filters
- I want to delete or edit (a) custom filter(s): Existing custom filters can be 'cleaned up' or edited by deleting or editing the related tag column from your product list. It can take up to 60 minutes before a product custom filter is removed from your filters.
- One or more tags cannot be cleaned up as they are still in use in a saved filter: In case you use a product tag in a saved filter, you are not able to delete (the product list with) that tag. To solve this issue, you can update or delete the saved filter(s) in question.
- I do not see my product tag back in the filter menu: It can take up to 60 minutes before you see the product tags back in (or removed from) the filter menu.