This article explains how to create, fill and organize a new dashboard with (free text) widgets.
Create a new Dashboard
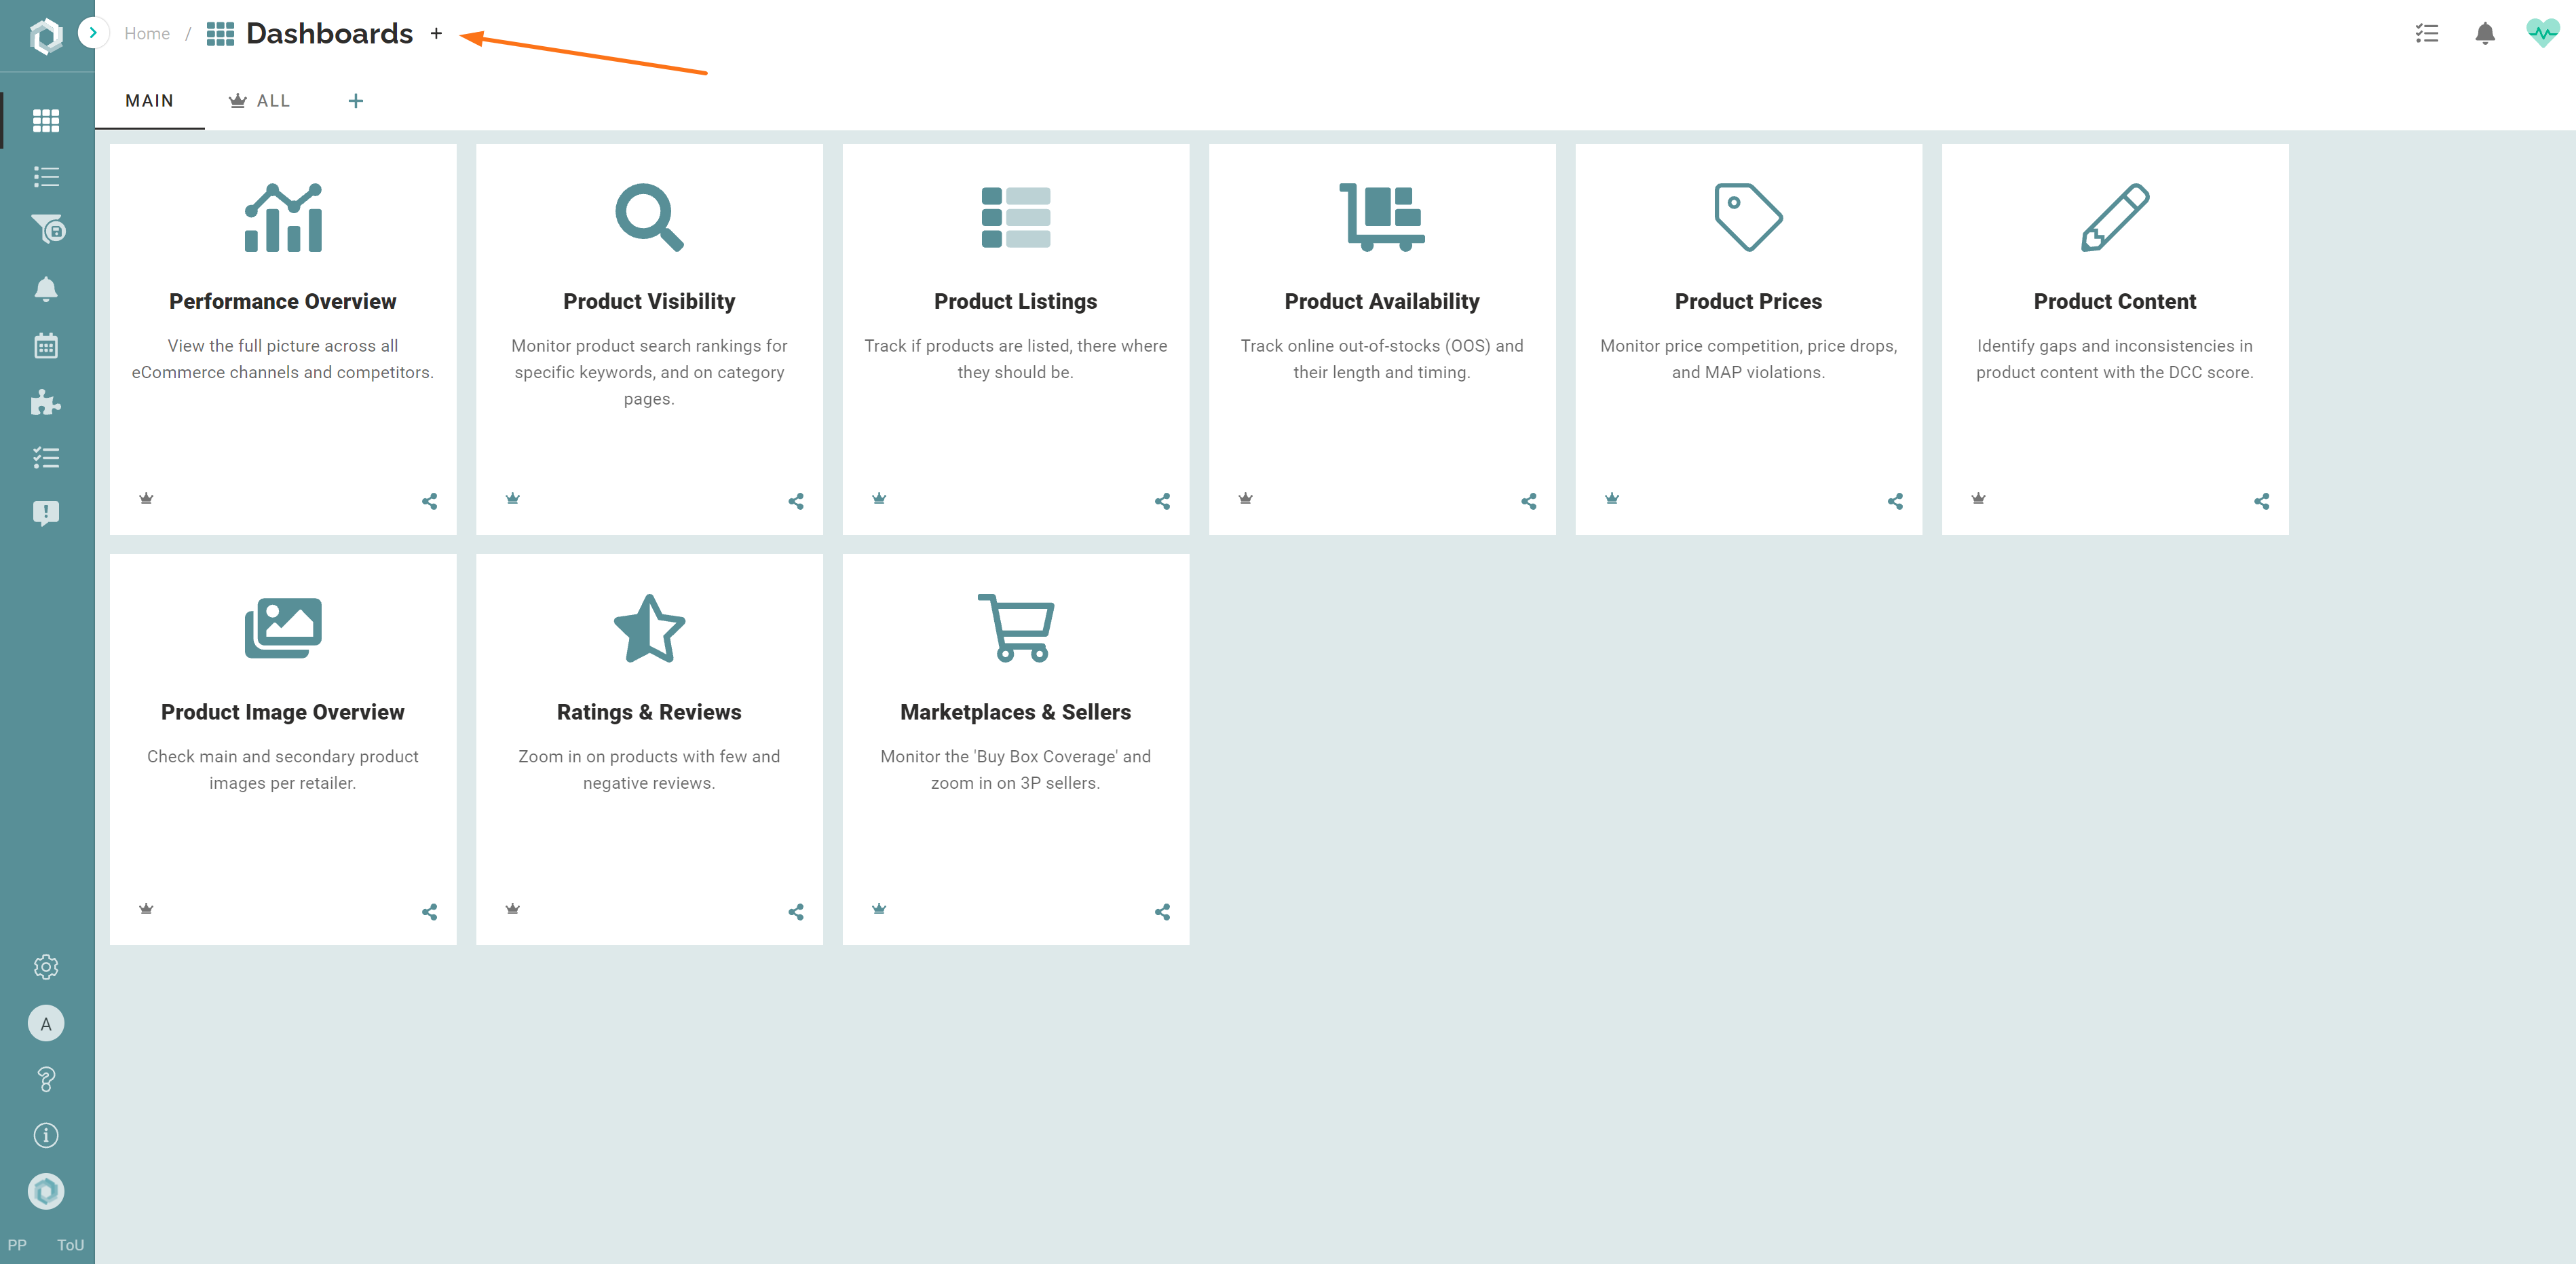
To create a dashboard, you first:
- Enter the dashboards section

- Then click on +, next to the word 'dashboards' on the left top of the screen.
Dashboard groups
- Use dashboard groups to organize widgets within a dashboard.
- Once you've added one or more widgets to your dashboard group, you can create another group.

Add Widgets to a Dashboard Group
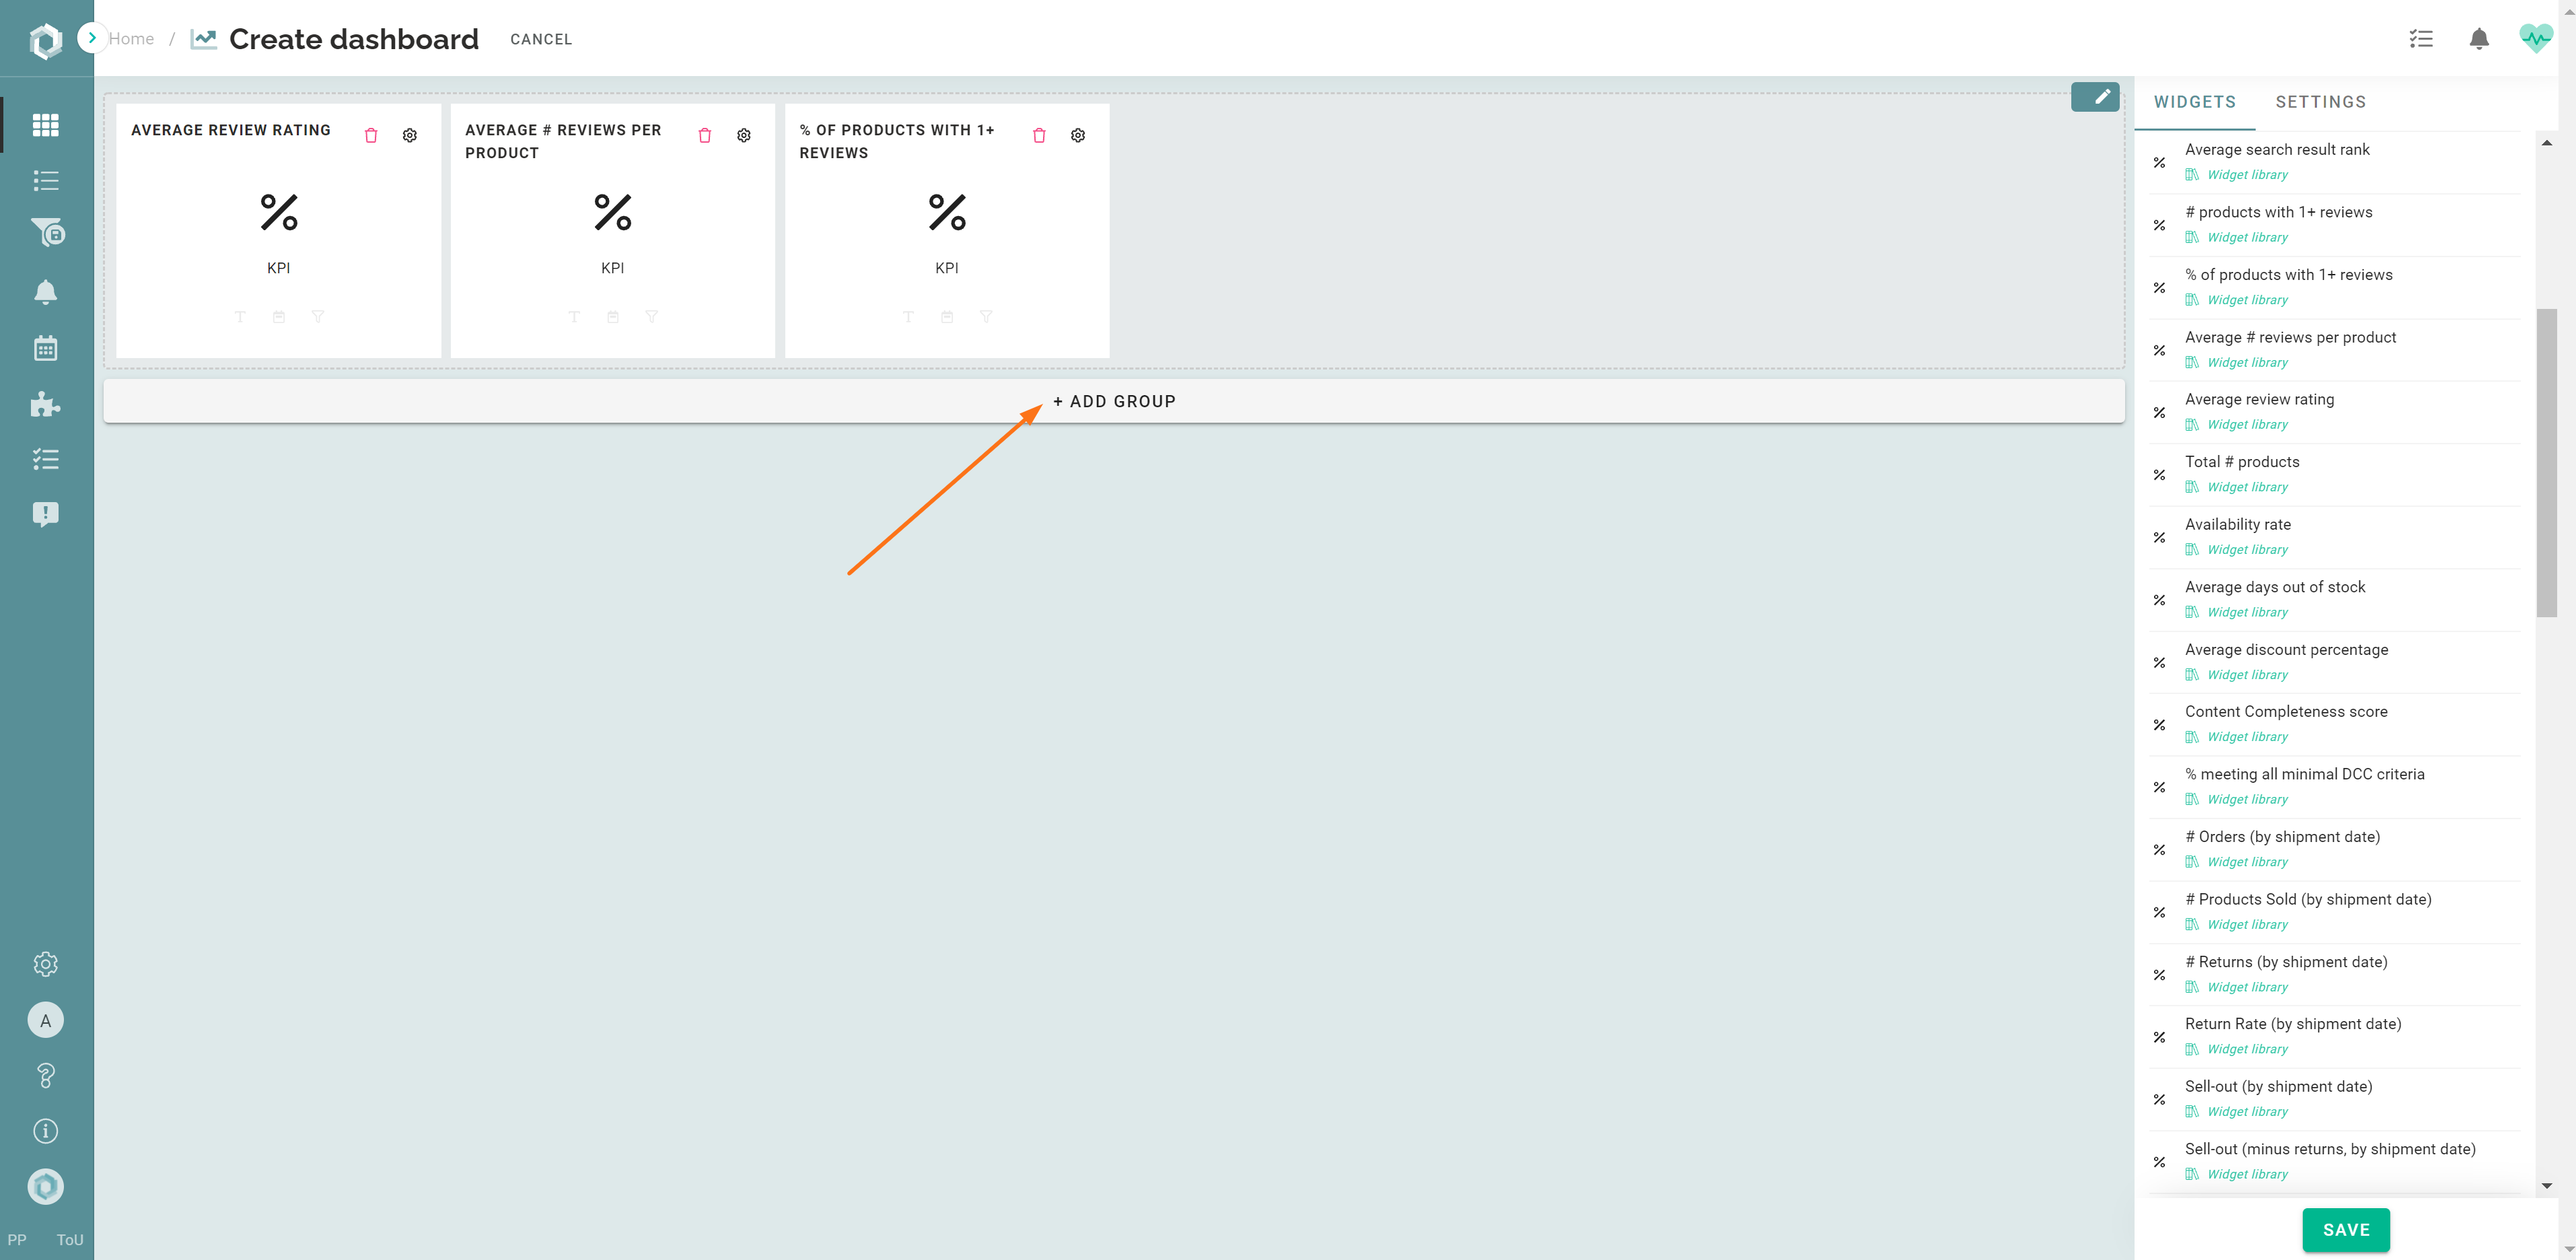
Under the 'widgets' tab, you can find all available widgets:
- Drag and drop the widgets of your choice in the group.
- When a group contains one or more widgets, another group can be added (see image below).
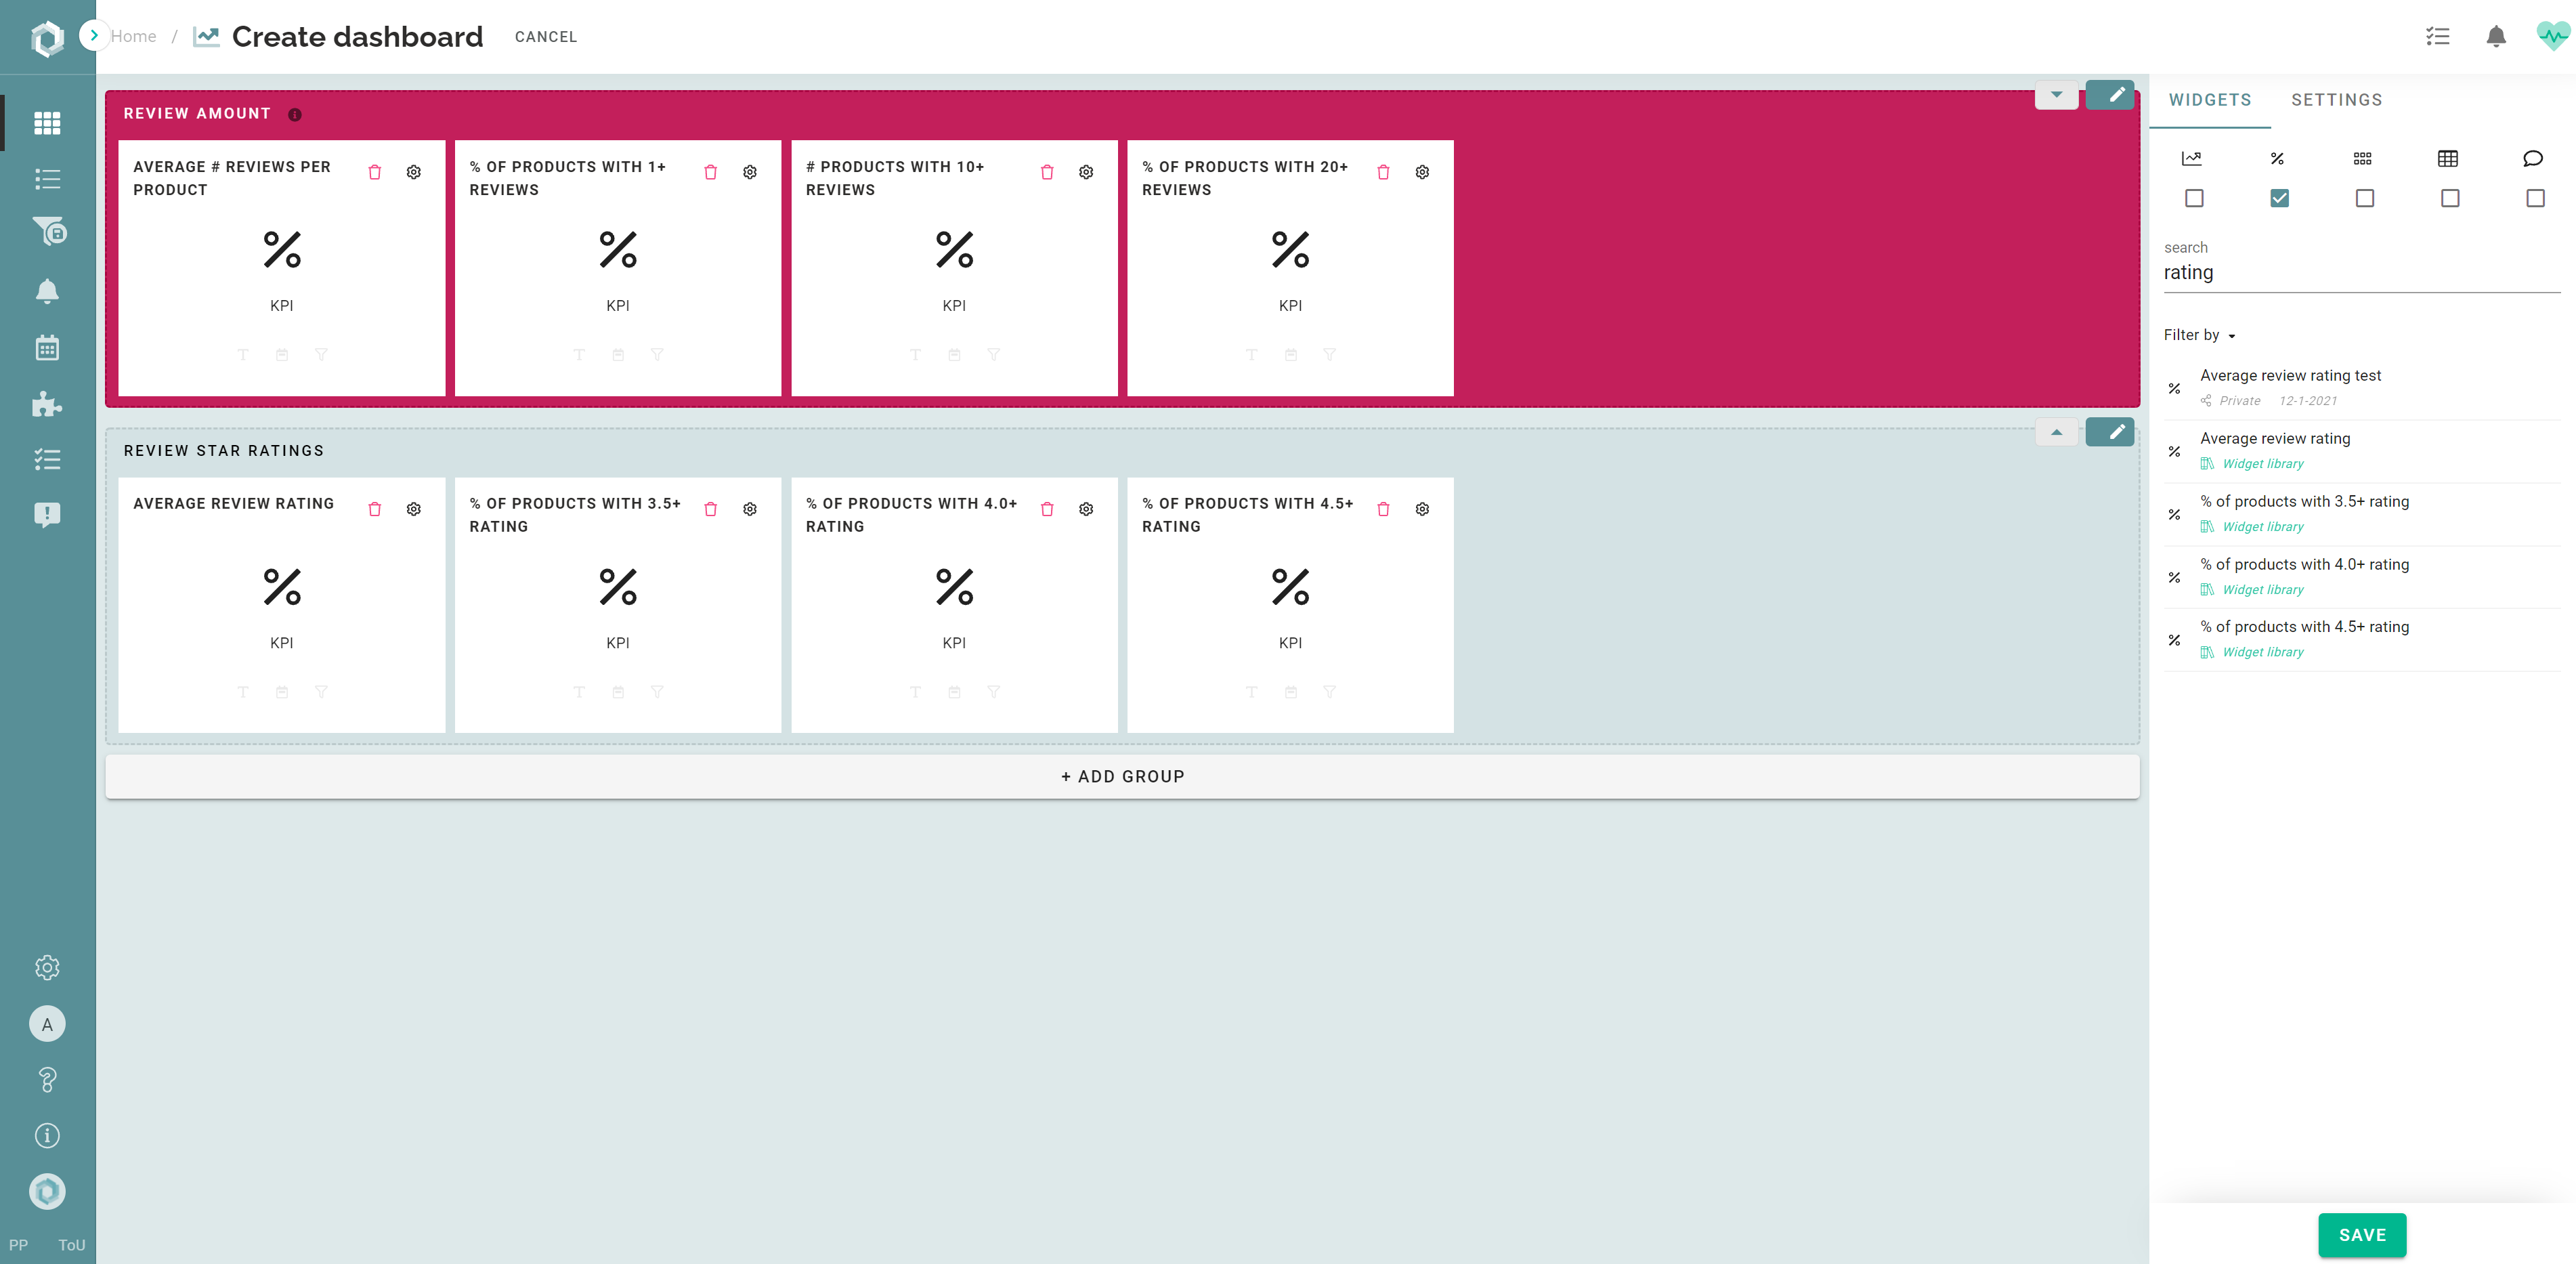
Create and Style Dashboard Groups
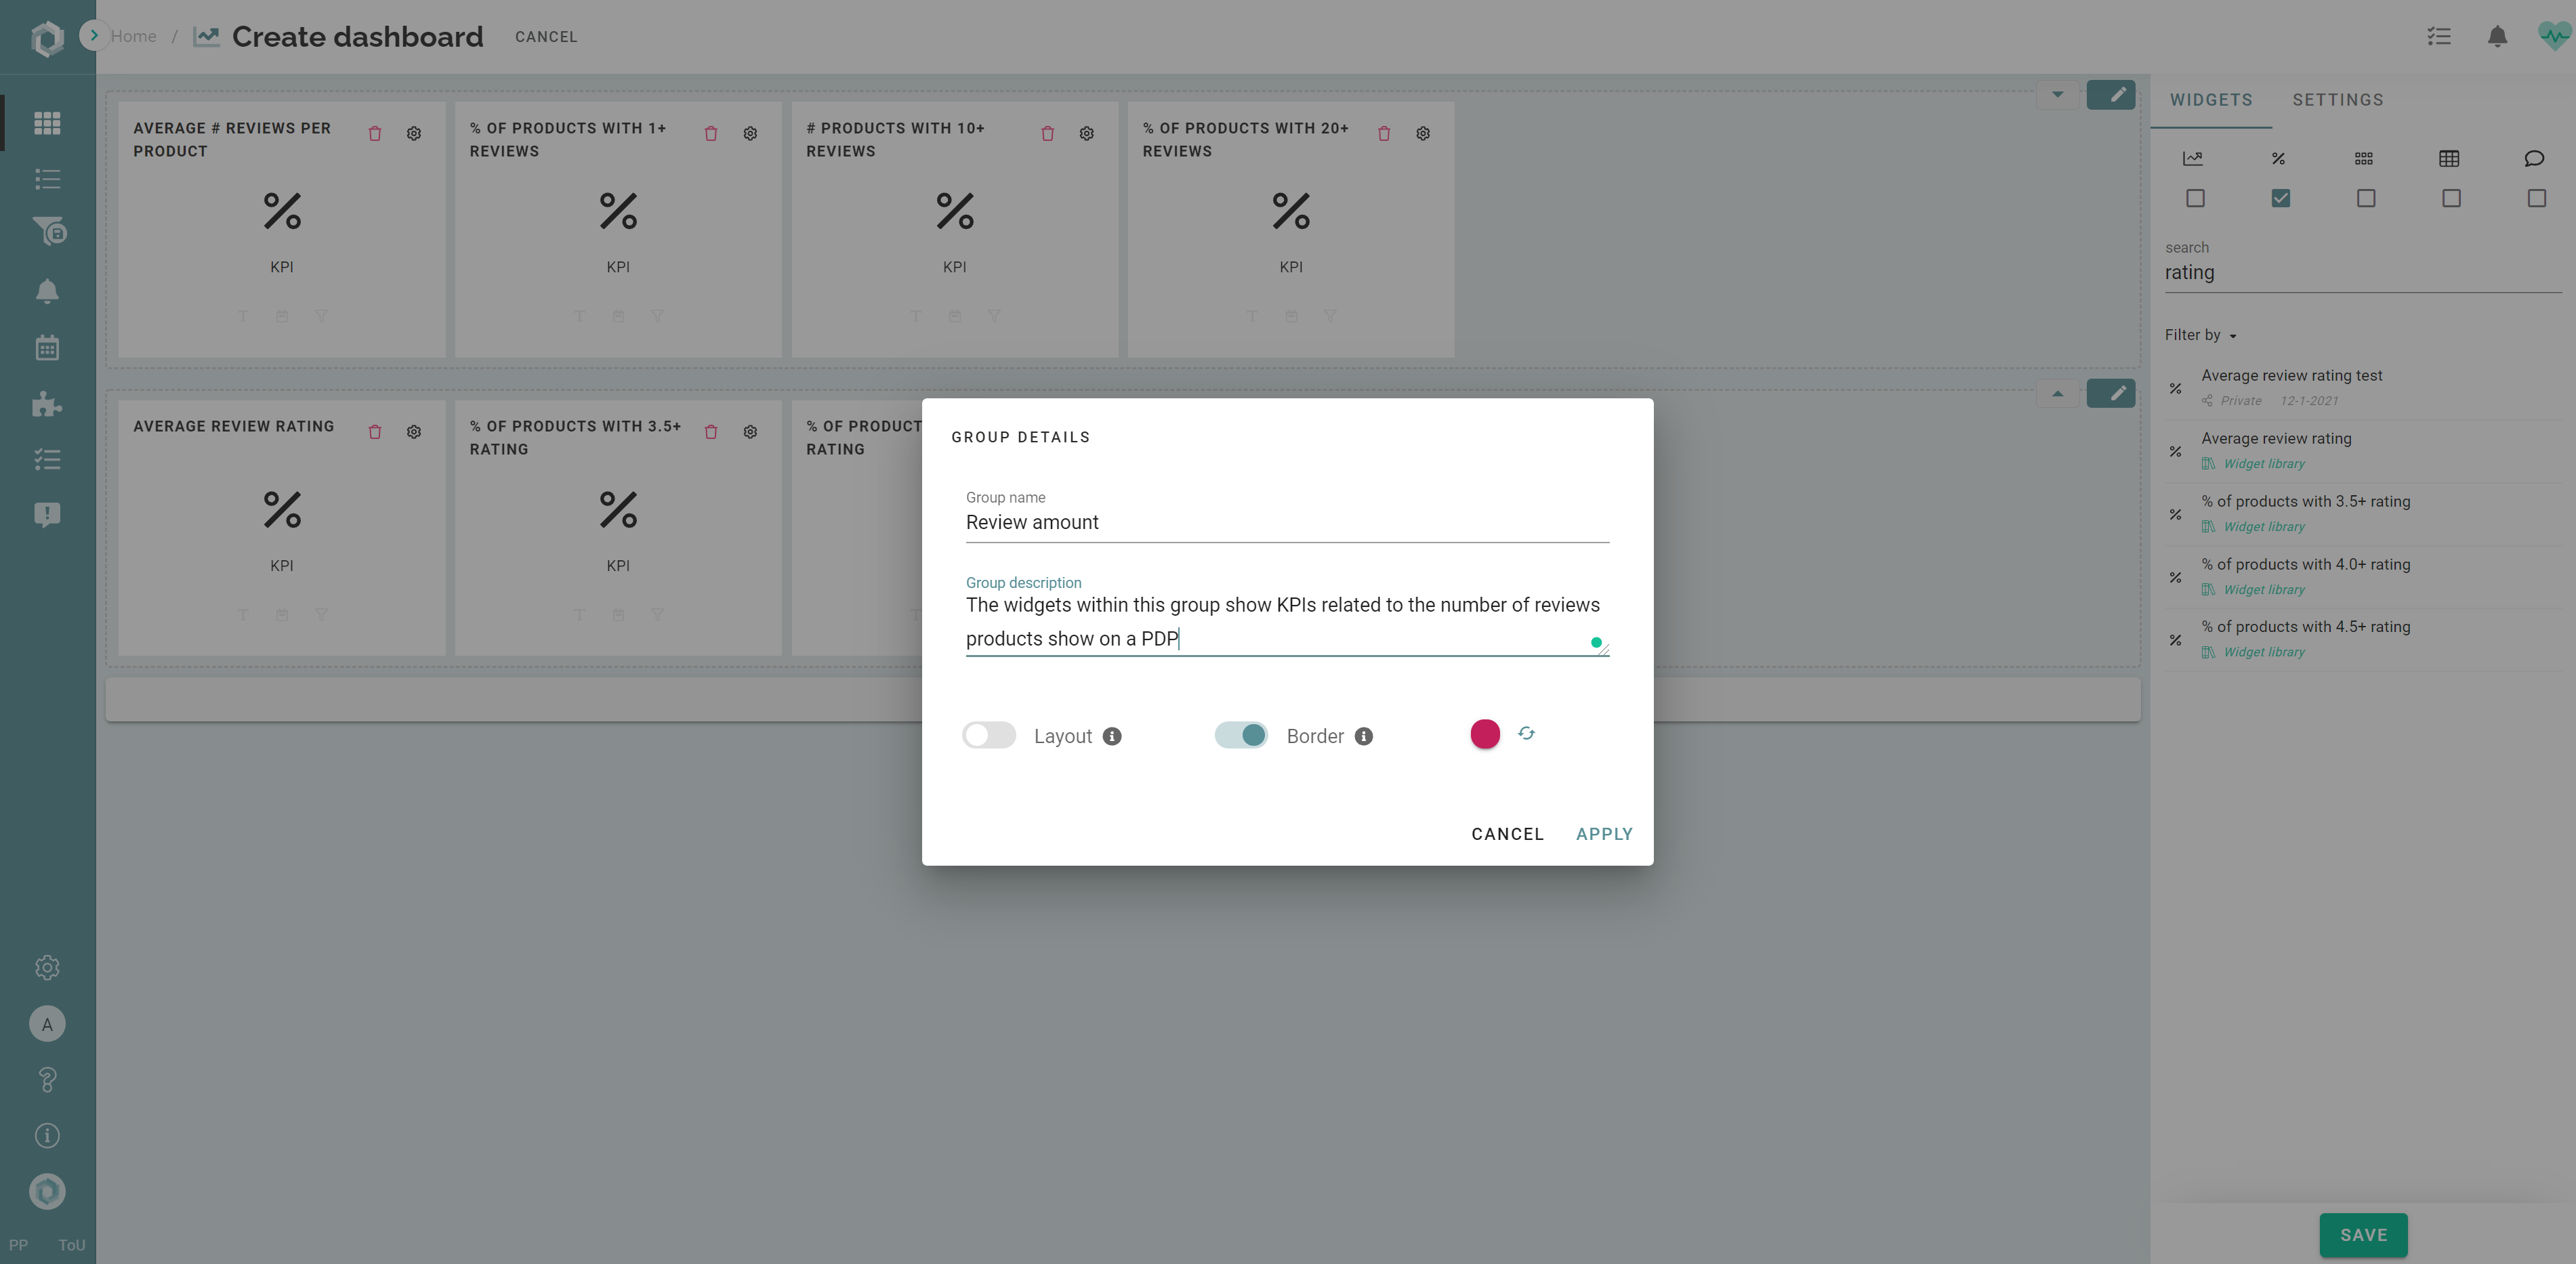
- In the image below, we've created 2 groups and added widgets to both groups.
- Click the pencil icon at the right upper corner of a dashboard group to add or edit a group name, description, or change the layout (fill, border, and background color).
- Click apply.
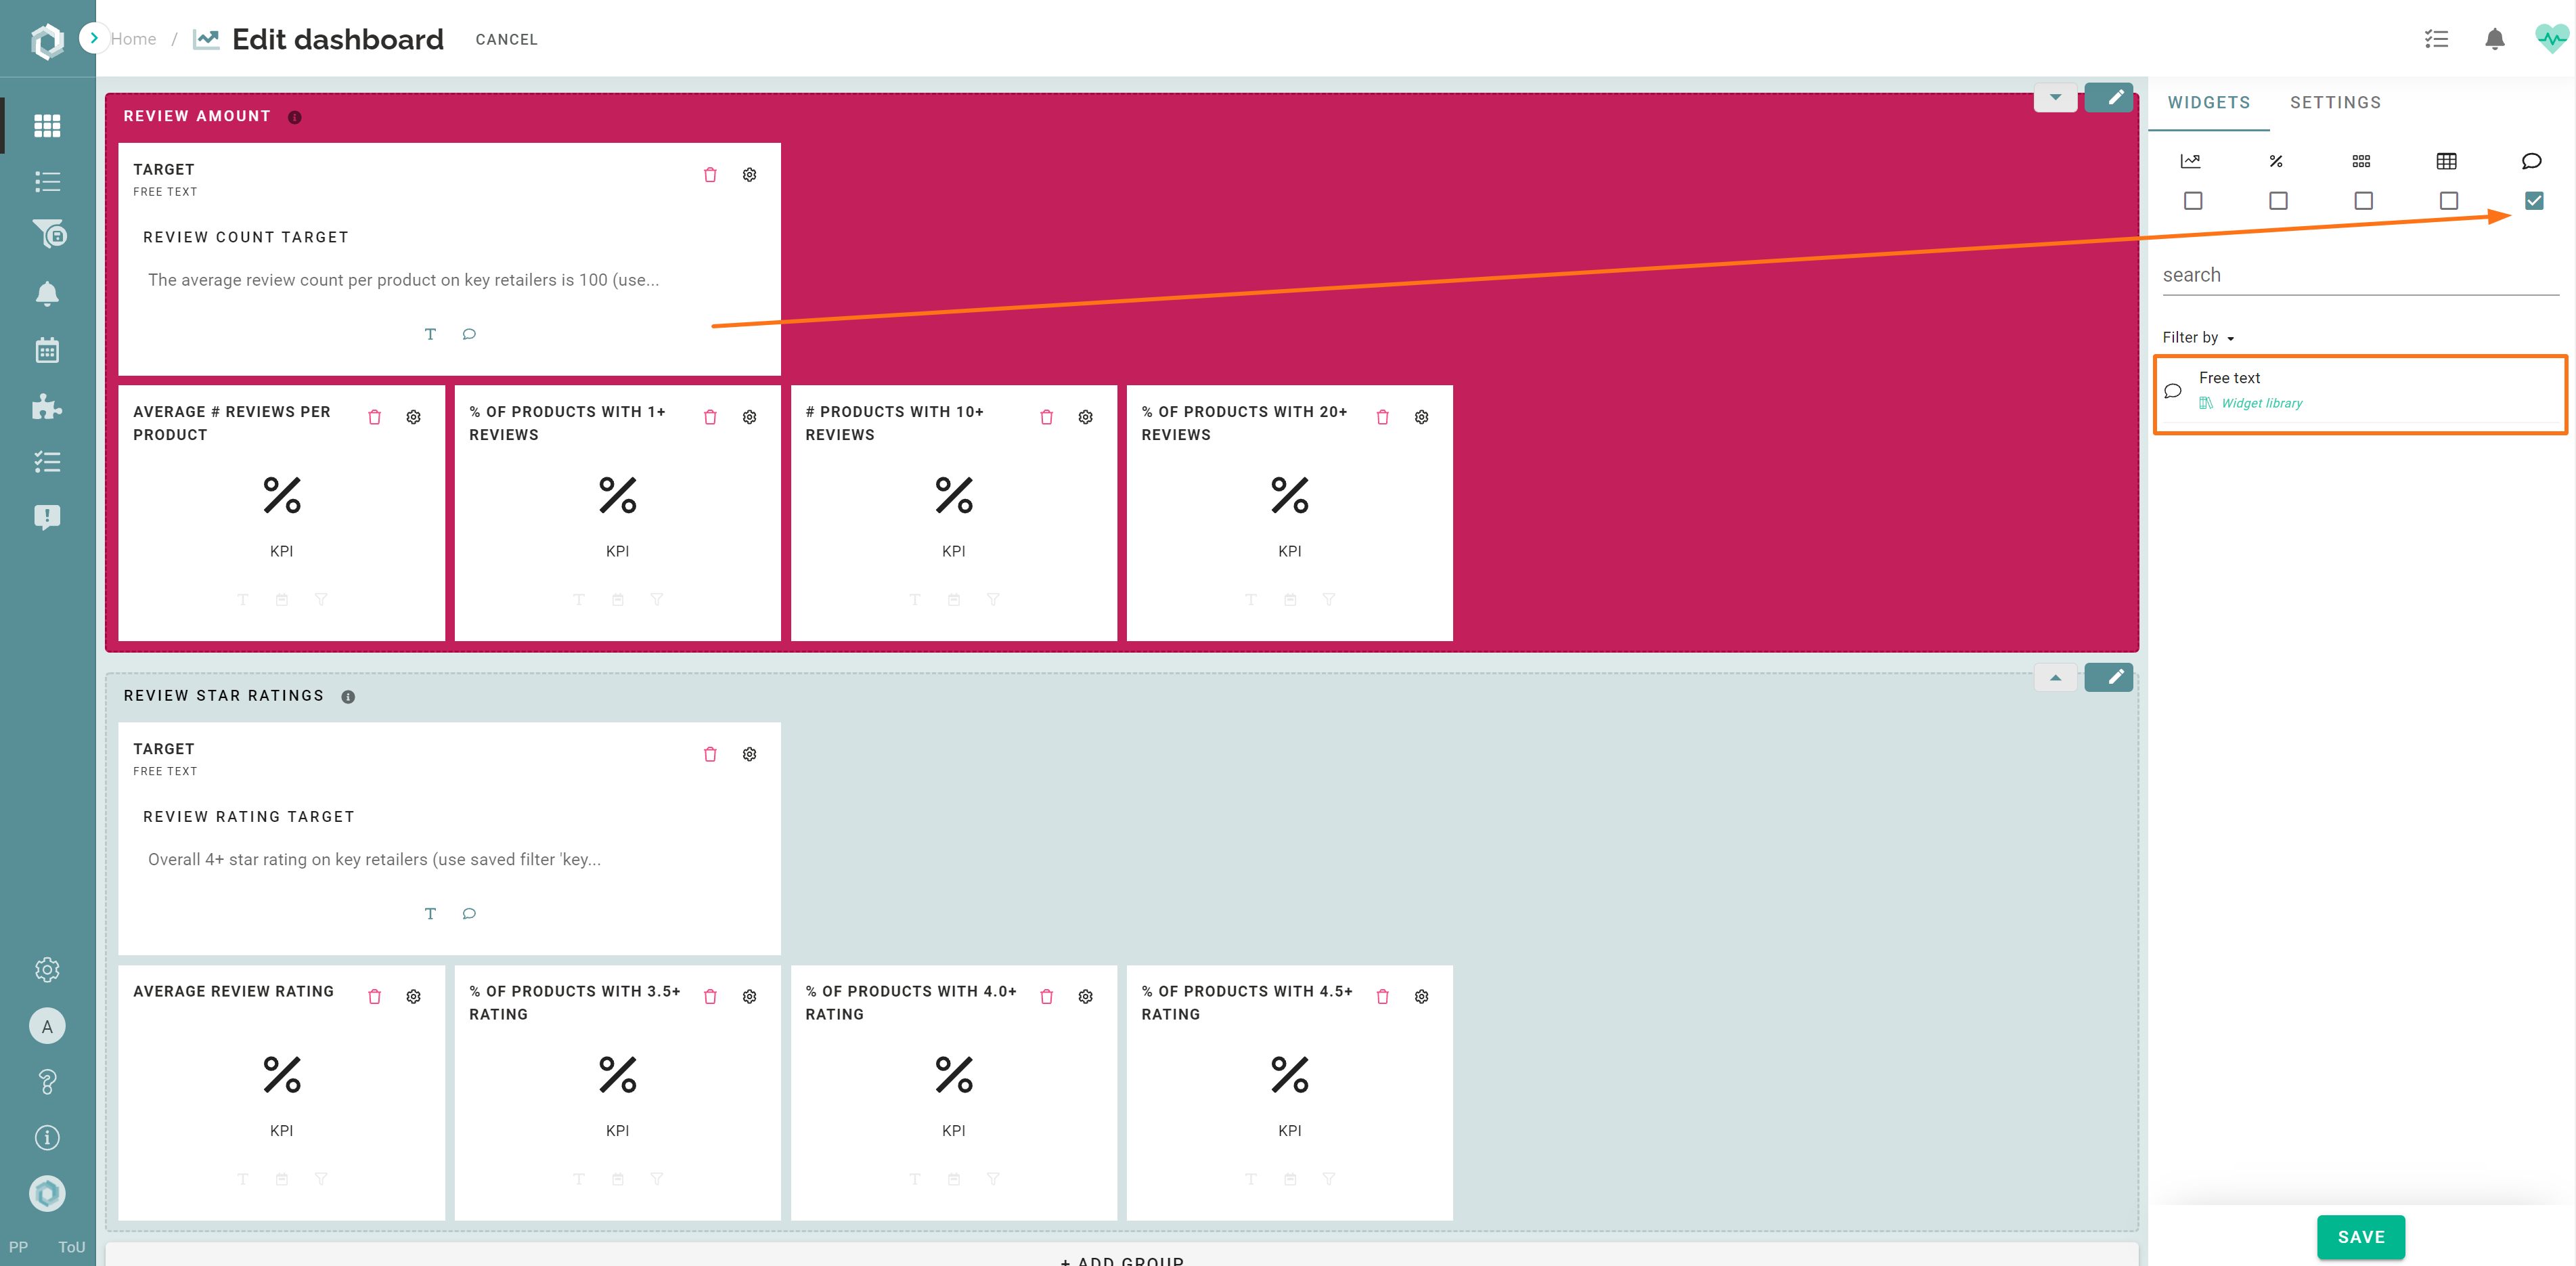
OPTIONAL: Add Free Text Widgets
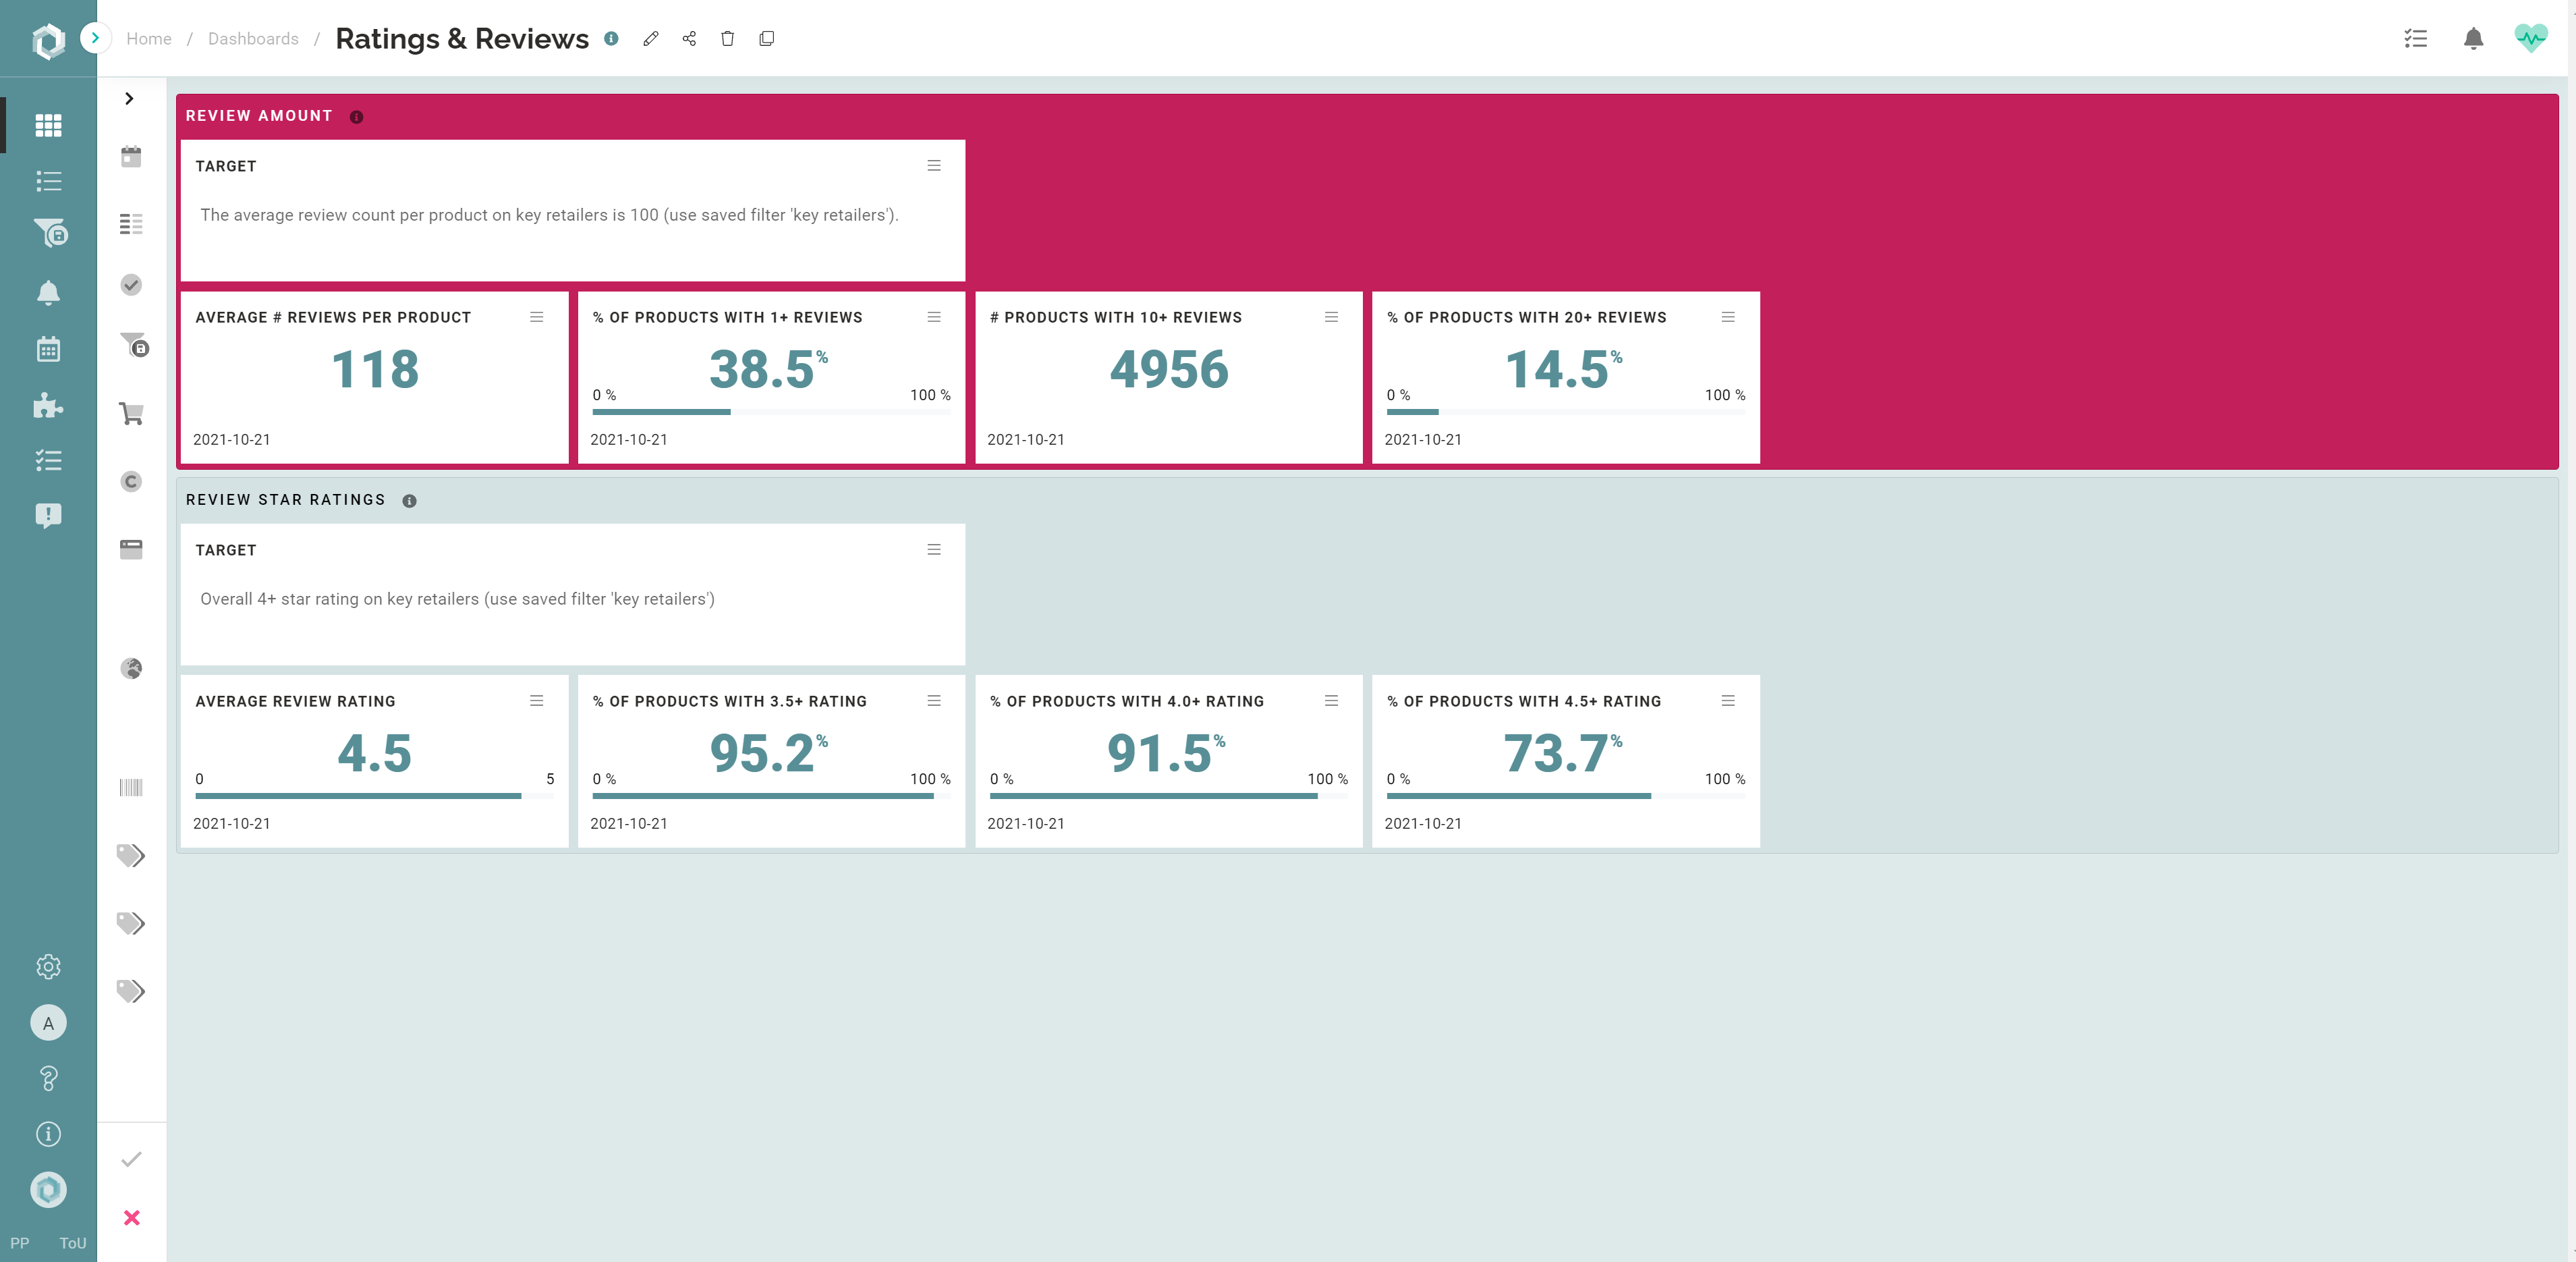
- Add a 'free text- widget to a dashboard group. Text widgets allow you to add free text/information to your dashboards. For instance, you can add targets for your teams (see example below). Learn more about it in this article.
Set the Dashboard Settings
Click the 'settings' tab to:
- Add a dashboard name and description
- Select a default saved filter for your dashboard
- Set the default date range for your dashboard
- Select an icon for your dashboard
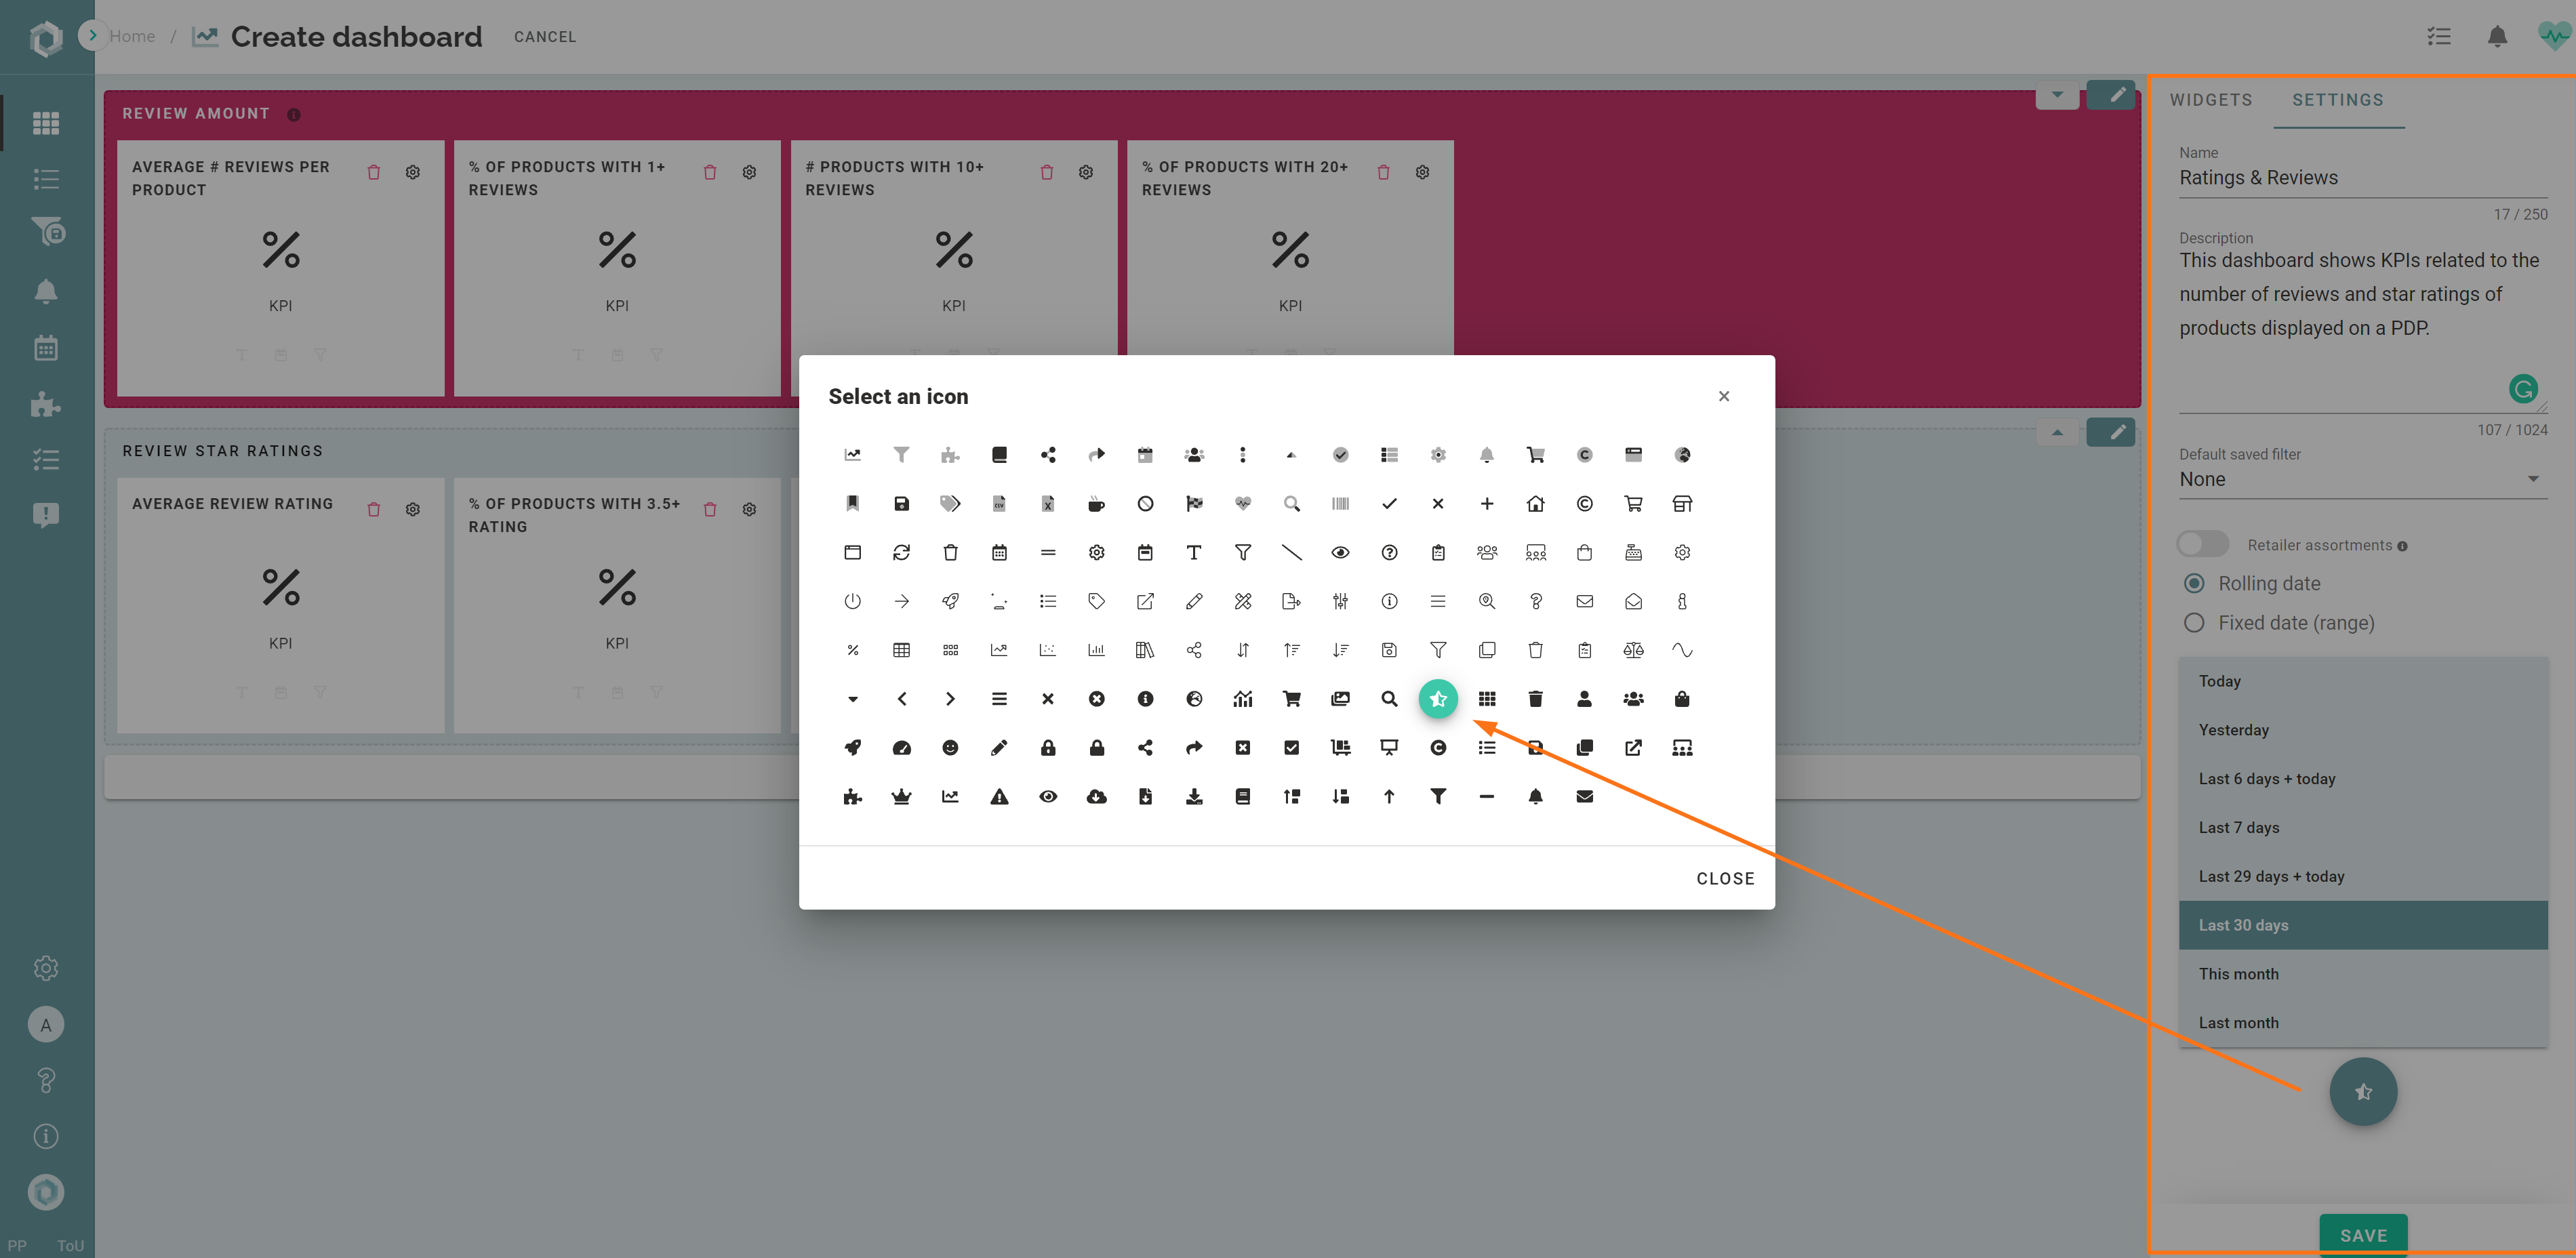
- Then click the 'save - button.'
- The dashboard will look as follows: