You can apply default view filters on each dashboard. In this article we explain all default view filter options.
Apply filters to limit or modify the data in a dashboard view. For example, you can use filters to exclude retailers, sellers, brands, or products. To apply default filters on a dashboard view you first:
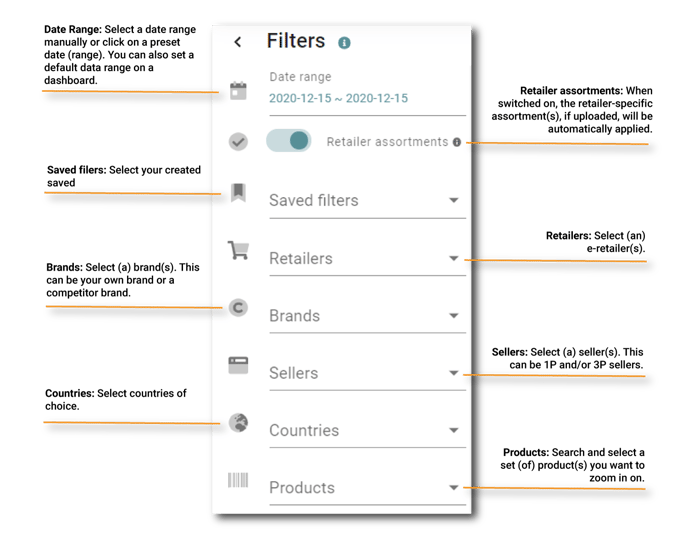
- Make your selection of default filter options (see image below for all default filters)
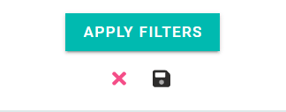
- Click 'Apply filters'.
Extra:
- Clear all filters by clicking the clear-icon

- Save your set of filters as a 'saved filter' by clicking the save-icon
 . Read in this article how to do it: How to create saved filters
Also read:
- Select and compare a date range:
How to select and compare date ranges over time
How to set a default data range on a dashboard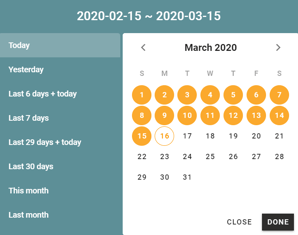
- Retailer assortment: How to create a retailer assortment product list
- Custom filters: How to create custom filters
- Set a default filter to a dashboard
Please note that, when setting the date range on “Today”, depending on the retailer and moment of the day, the data might not be completely updated up until that moment.

You can check the data freshness by clicking on the heart symbol at the upper-right of your screen. A green checkbox tells that the retailer’s data is up to date. An orange circle represents that the data of that day is not fully processed yet. When data is not fully processed yet, the data is not blocked. You can still see data, but in that case, it’s not real-time.