In this article, we explain how you can edit (the filter and export-, schedule-, and recipients information of) scheduled data exports.
TIP: If you did not schedule automatic data reports yet, read this article first to learn how it works: How to set up scheduled data exports.
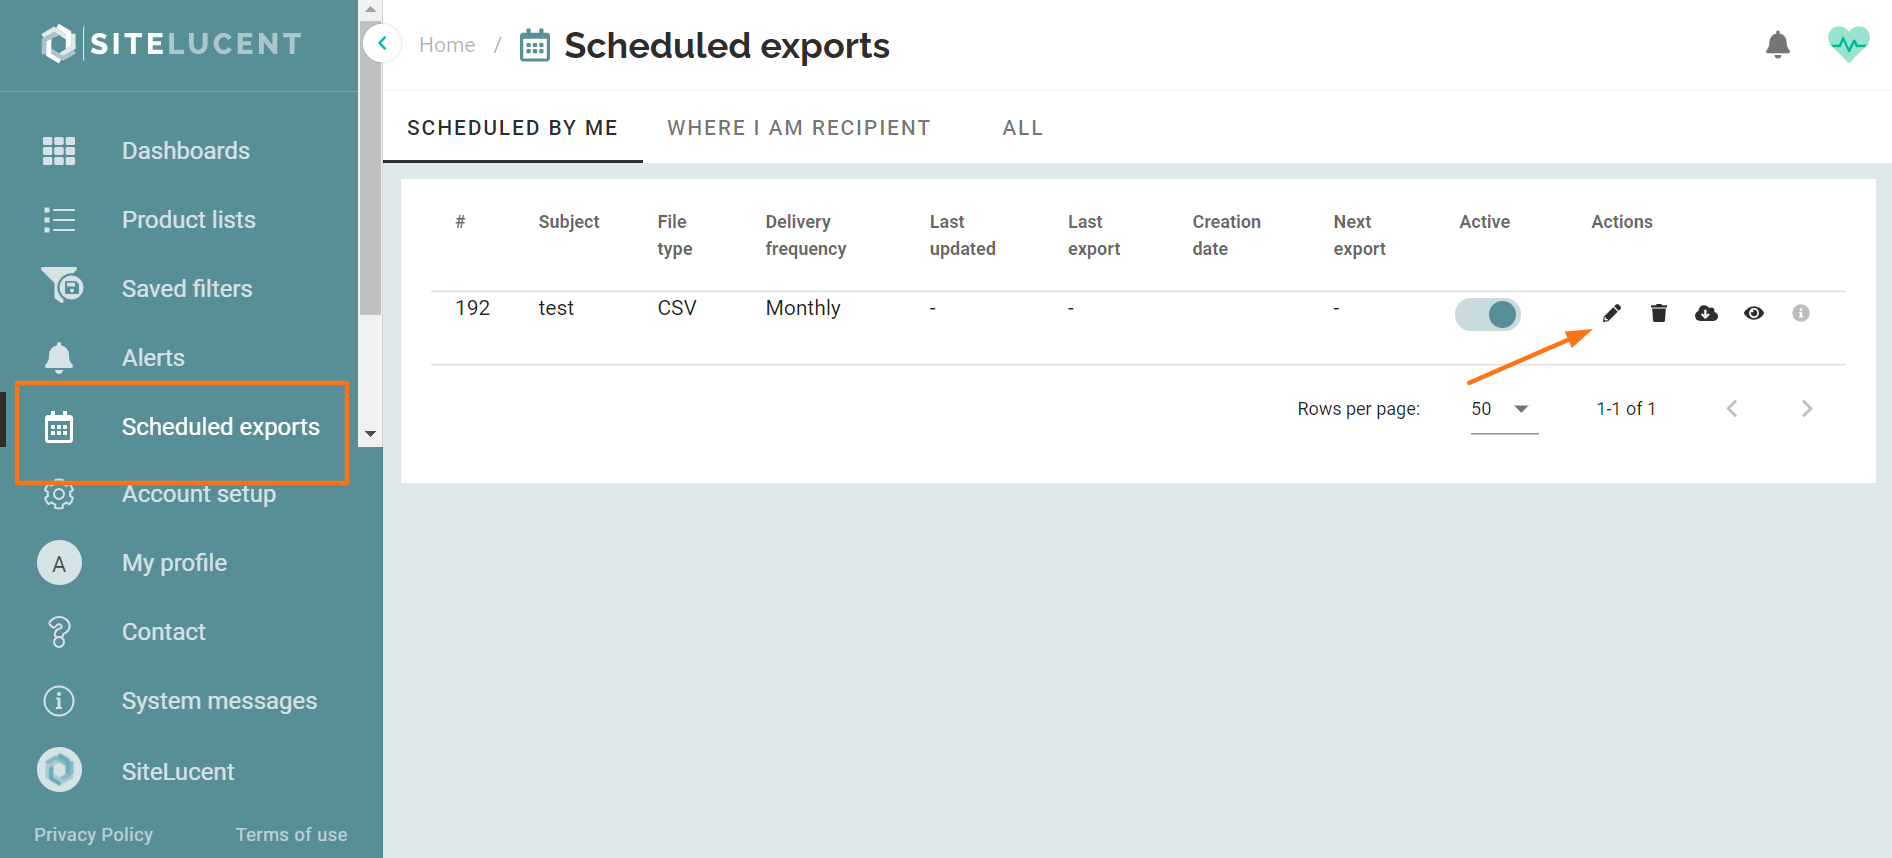
To edit existing scheduled exports you first:
- Navigate to scheduled exports
- Click the pencil icon in the action section of the scheduled export you want to edit.
Edit the filter setting
- Set the preferred filters in the left filter menu.
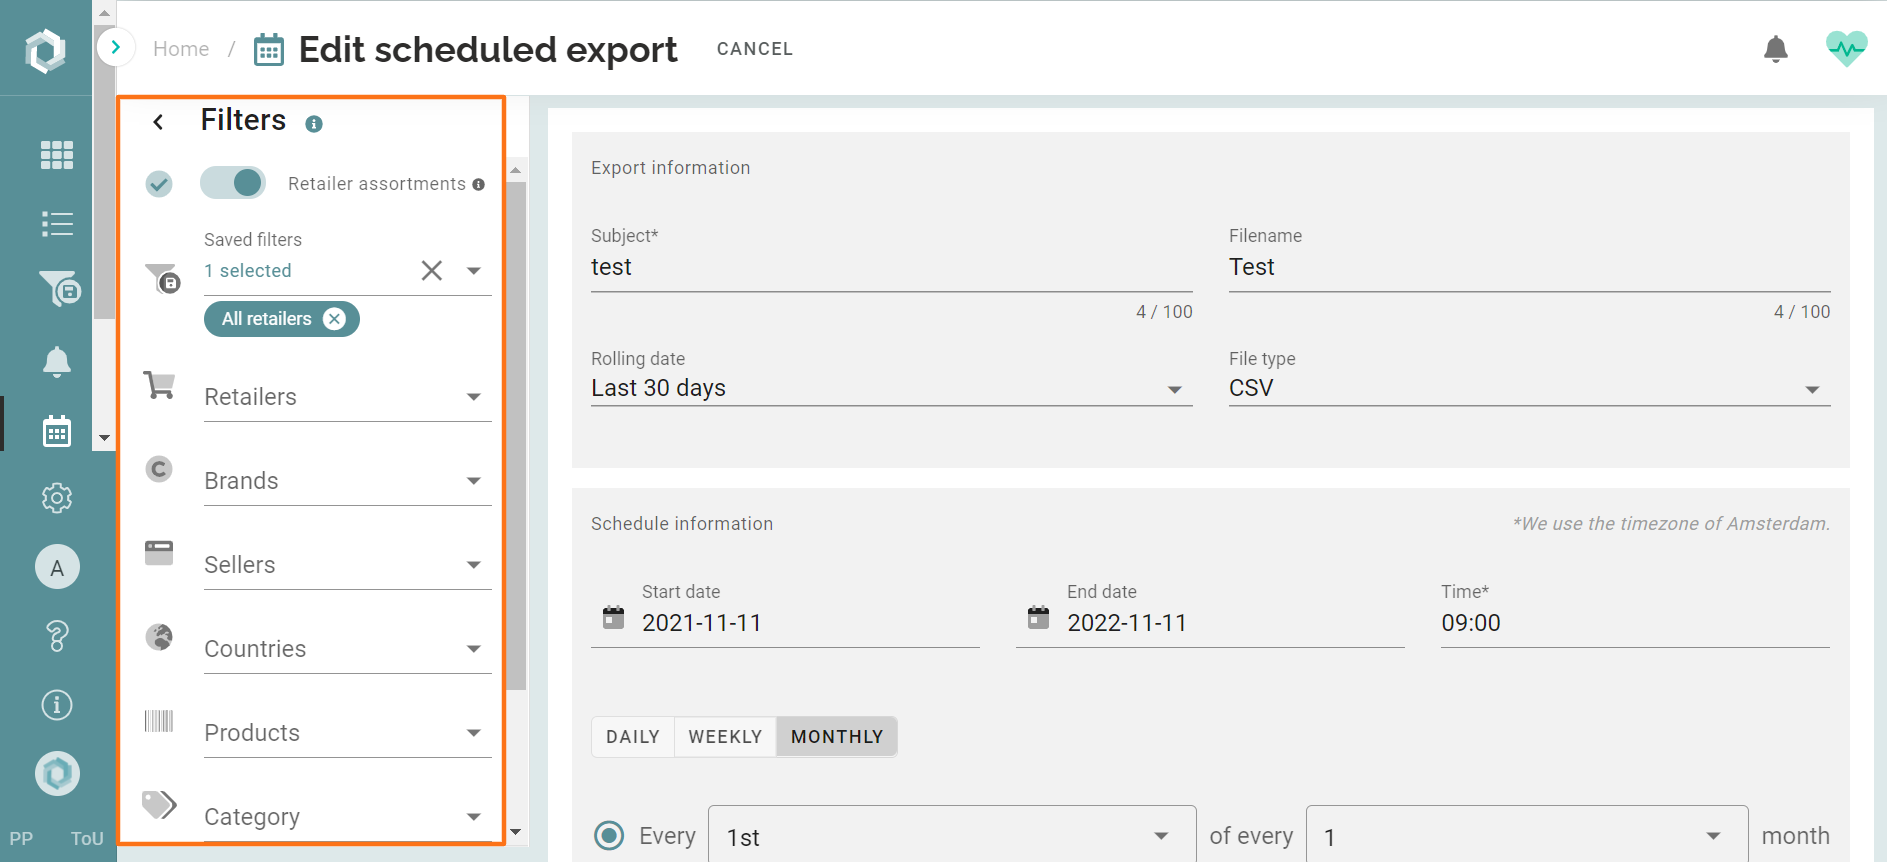
NOTE: The filters applied at the moment you schedule data exports, are the filters that will apply to your export. You can set up multiple exports on the same dashboard/widget, with different filters each time.
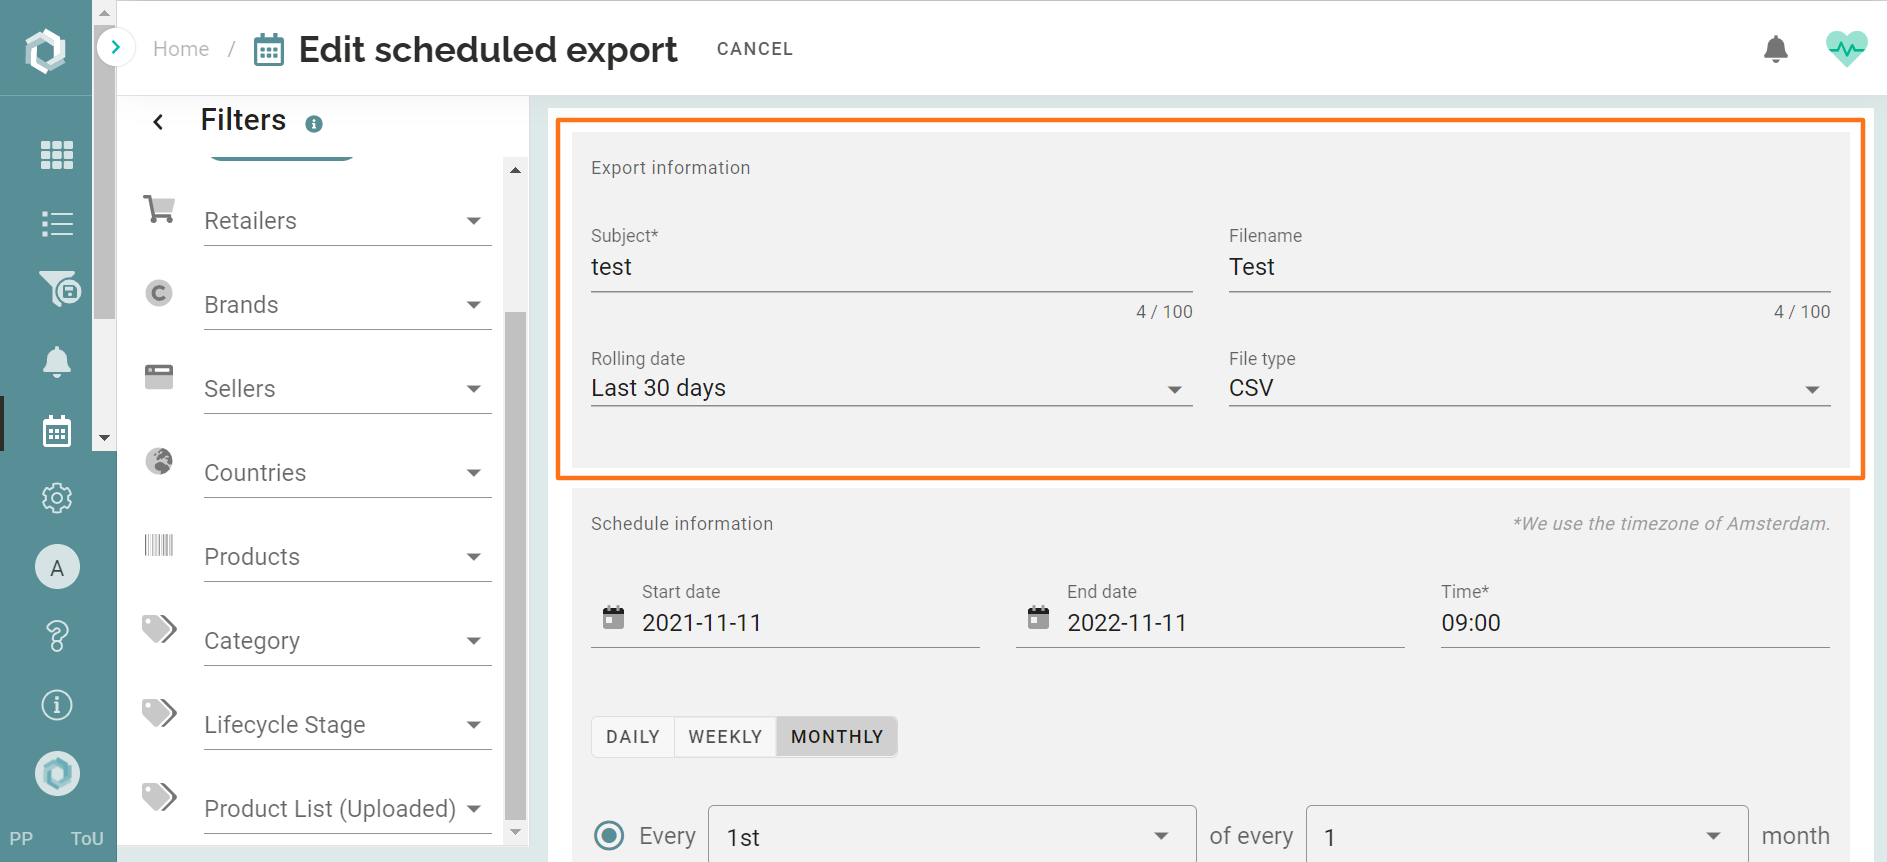
Edit the export information
Edit the:
- Subject
- Filename
- Rolling date
- File type: CSV or Excel
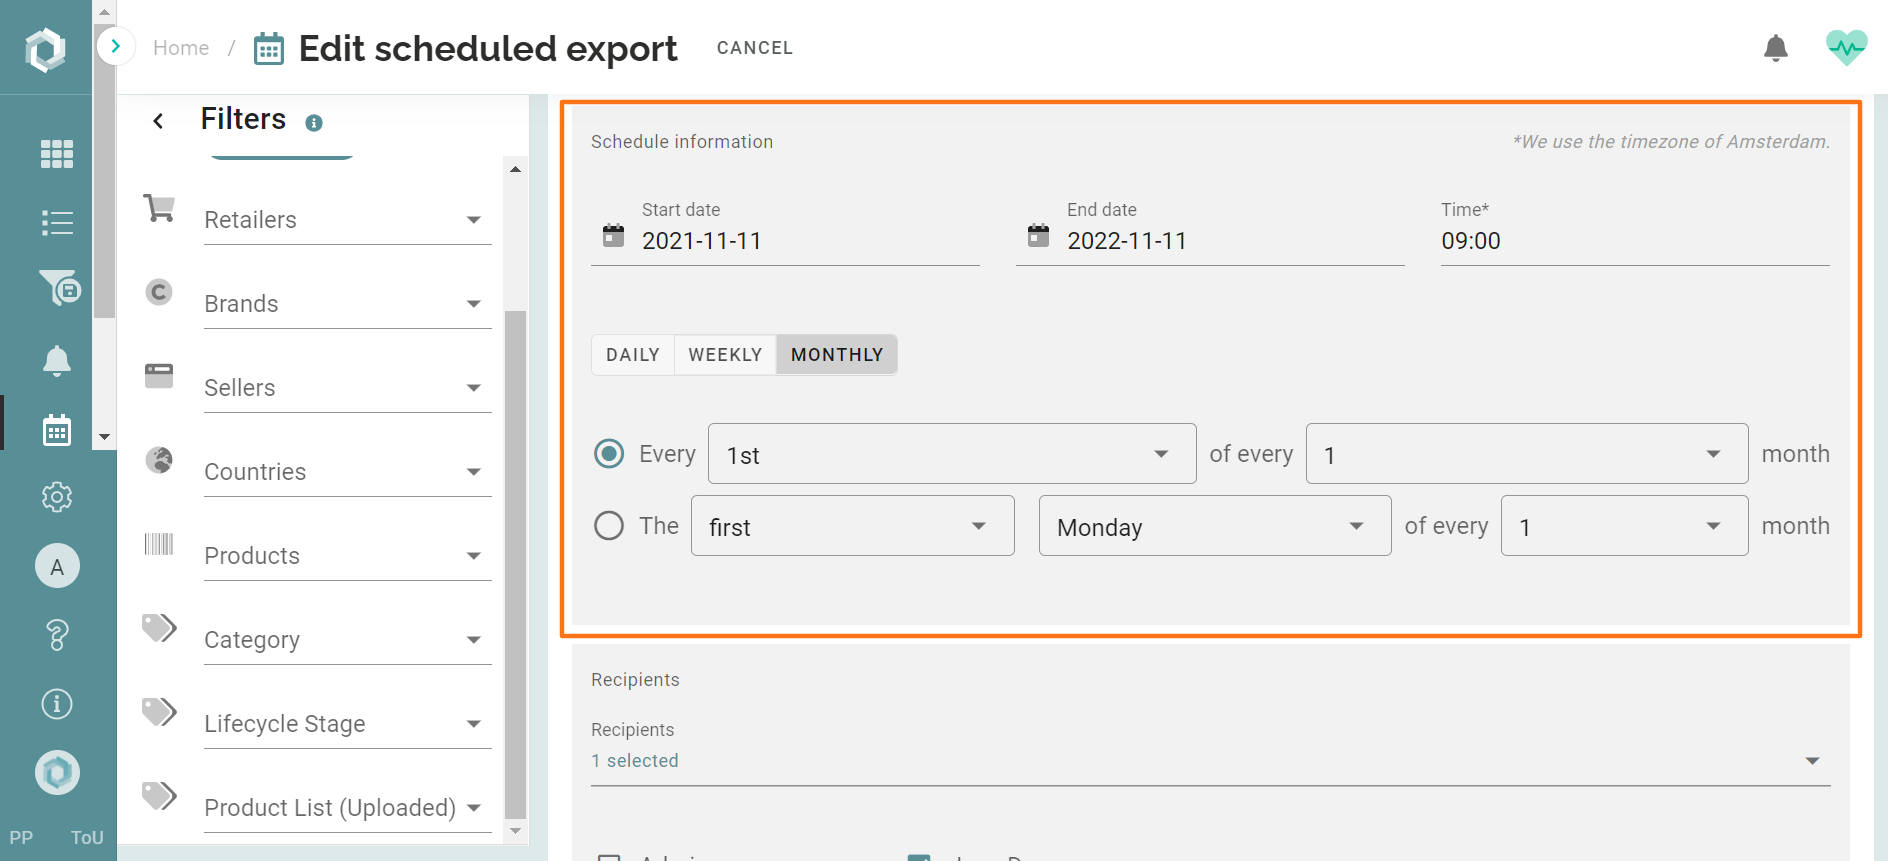
Edit the schedule information
Edit the:
- Start and end date of the period you wish to export data.
- The time you wish to export the data (We use the Amsterdam time zone)
- The frequency in which you want to export data
- Which specific days in the week or month that you want to export data.
Edit the Recipients
Edit the:
- Recipients you want to receive the scheduled exports by email.
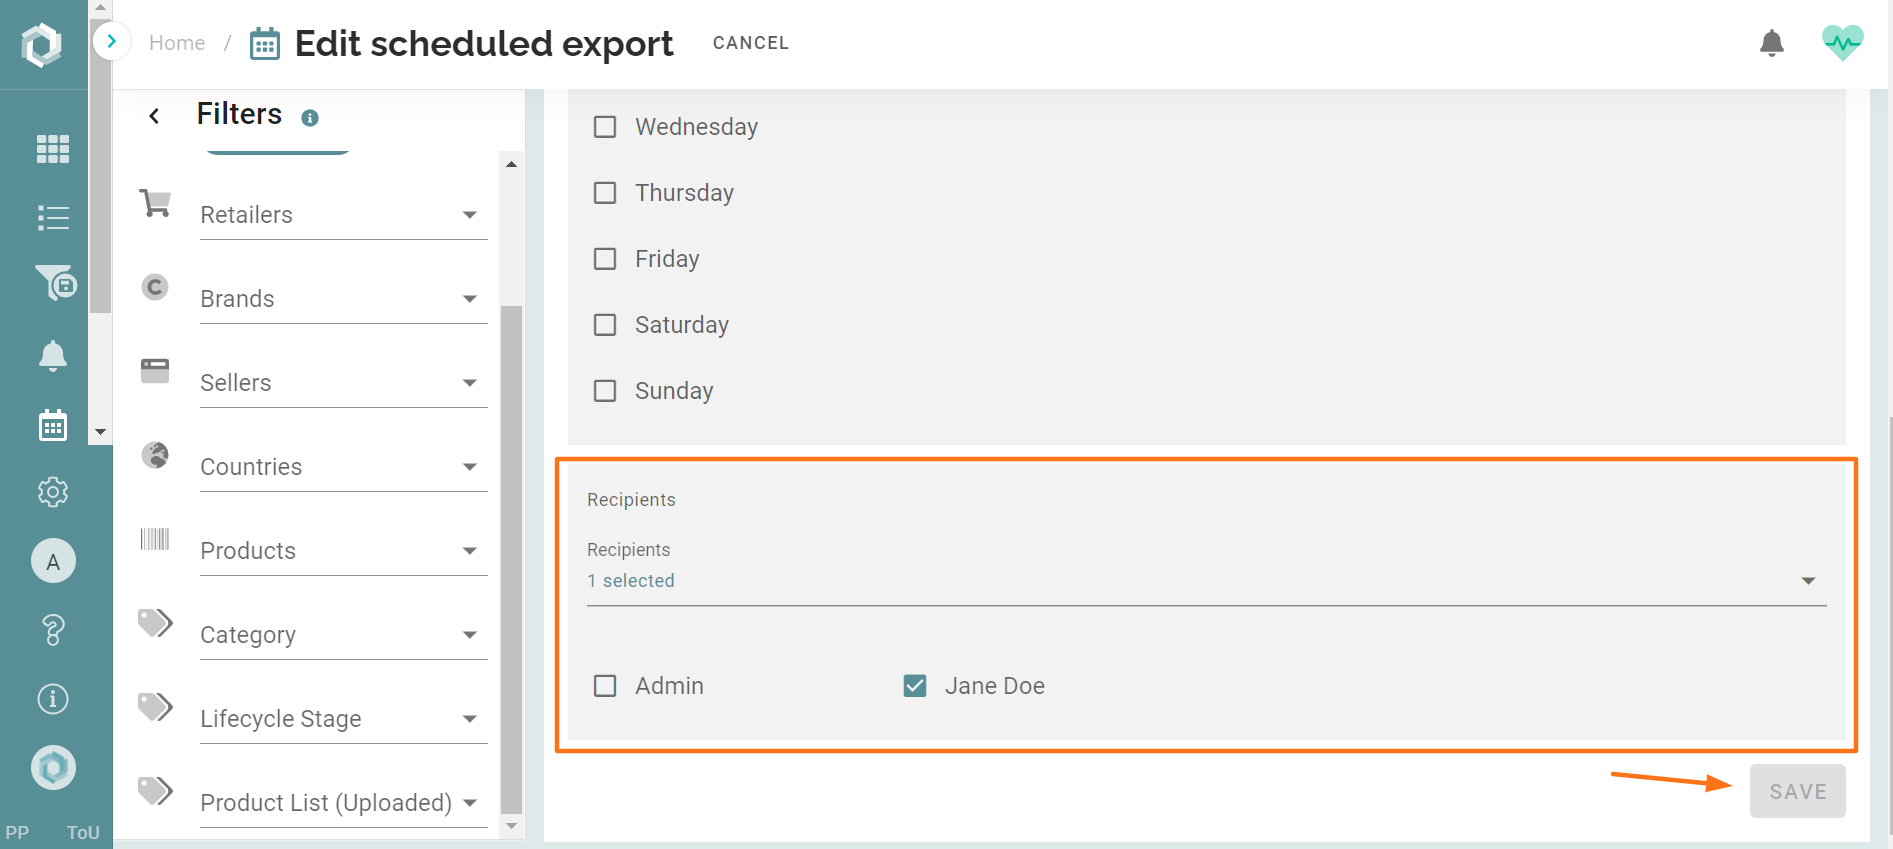
- Click Save.