The Product Management tool enables you to access and update a set of products. When correctly matched, these products and their associated information appear in various in-tool locations, providing valuable insights across different types of dashboards. Think of the Product Management screen as the single source of truth for your product data.
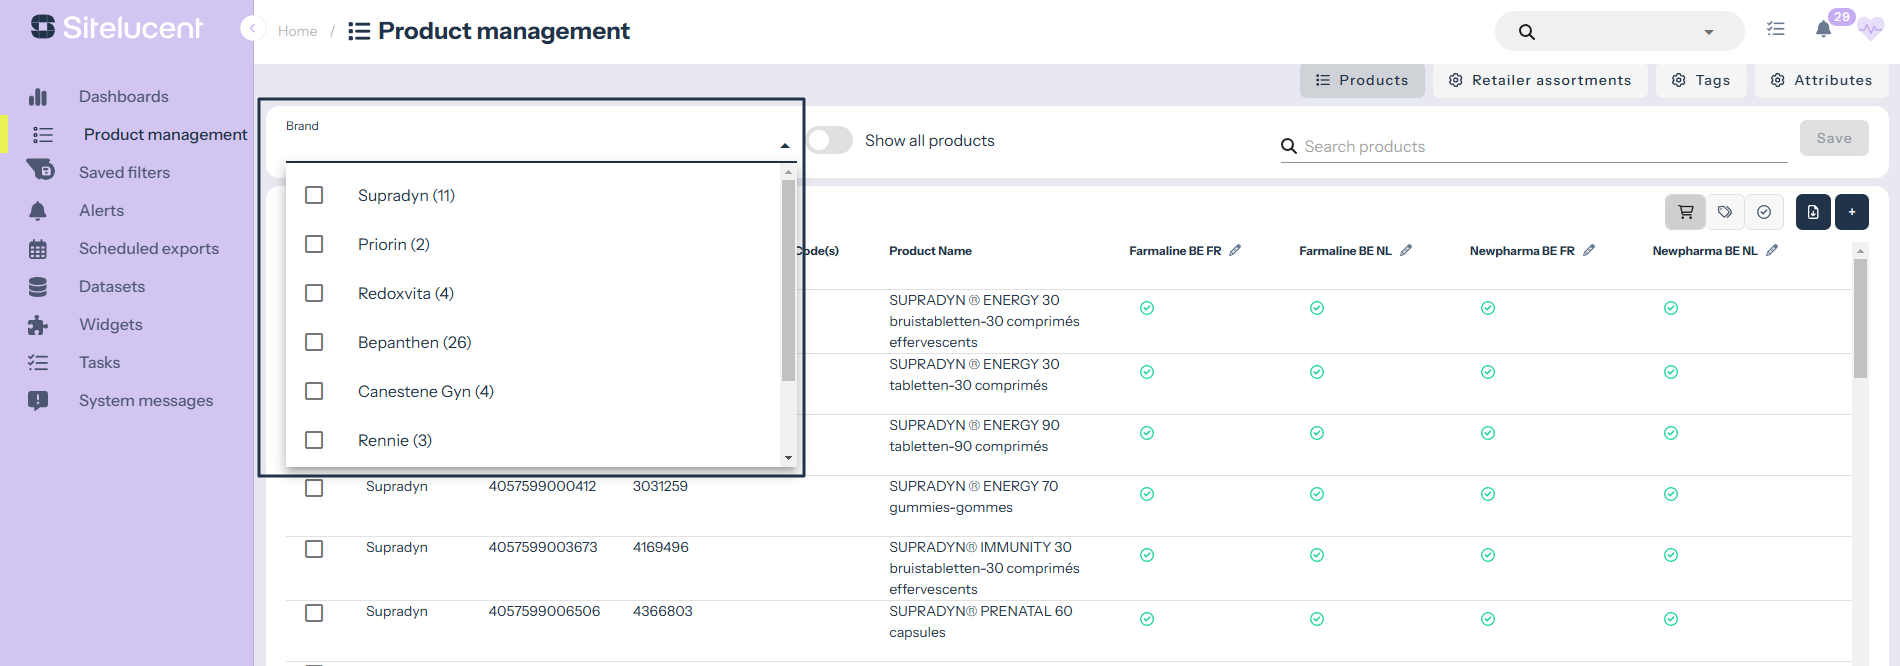
Want to explore details from specific brands? Select or type in the names of the brand(s) you want to see in the Product Management module. Additionally, you see how many products will be shown between brackets.
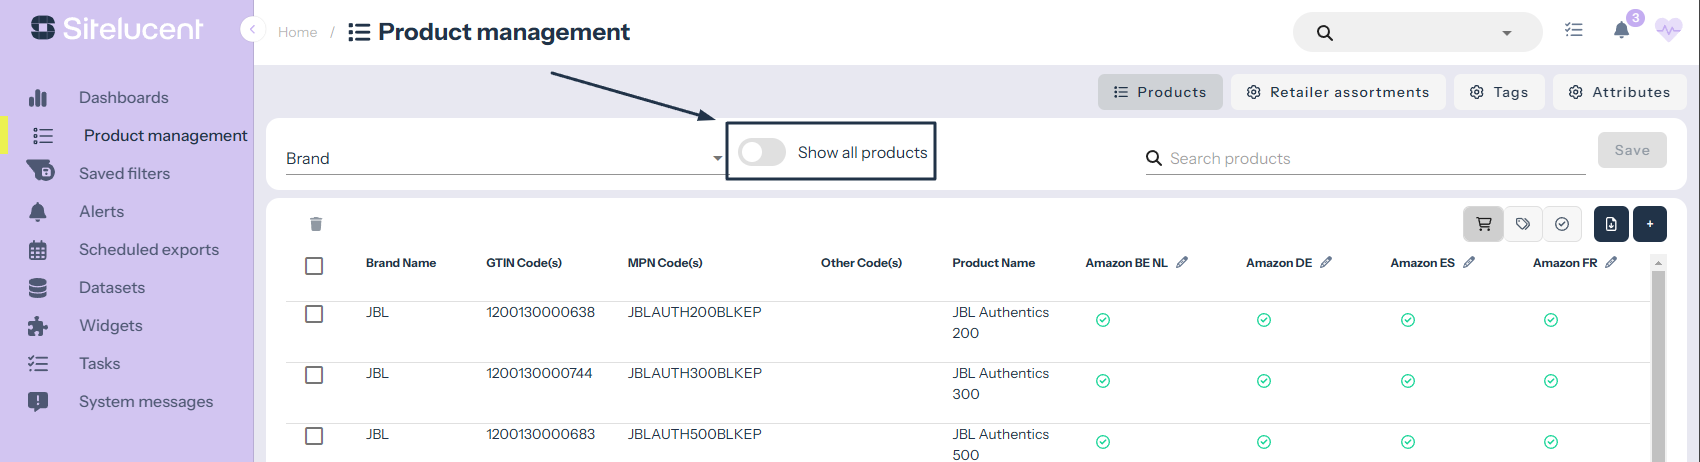
If you find yourself deep in the rabbit hole, don’t worry—there’s a way out! You can always track the total number of products in the Product Management using the “Show All Products” switch. This feature is useful, especially if you’ve filtered your product set using the brand filter (seen left) or the inline search bar (seen right). As shown below, any products that don’t match your current selection will be greyed out – but can still be selected!
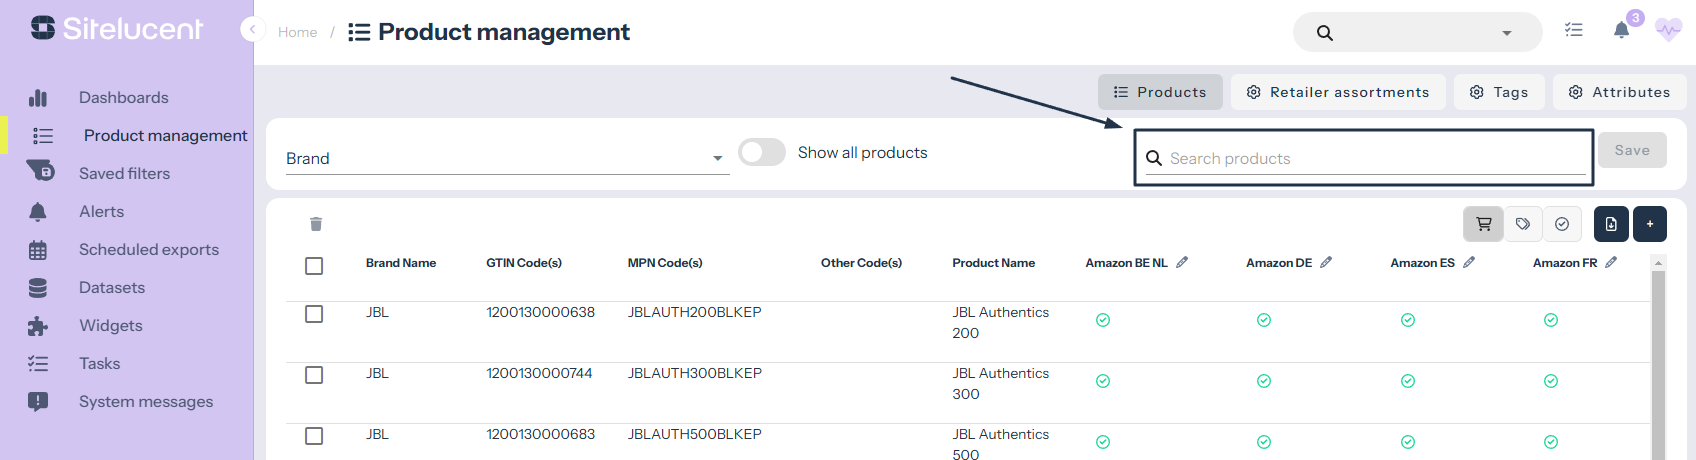
The linked results will be displayed when you enter one or more keywords in the search bar. The result page considers all fields entered in the inline search bar. If a product (partially) matches the name or any of the GTIN(s) or other Code(s), it will appear in the results.
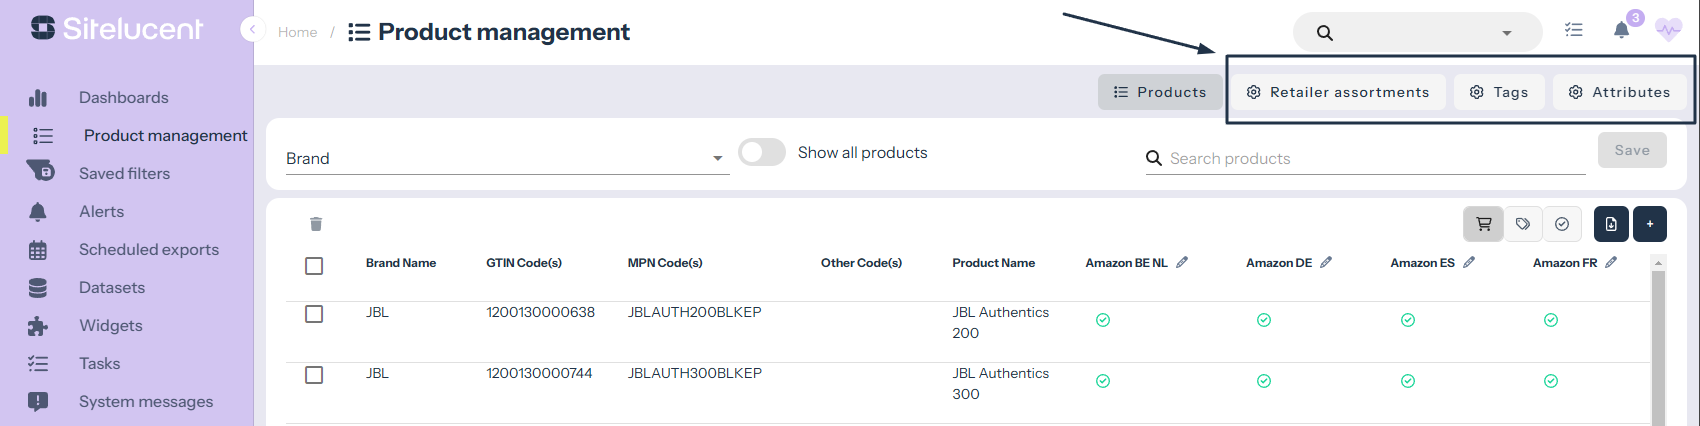
Tags, attributes, and (retailer) assortments must be managed since products and their relations change over time.
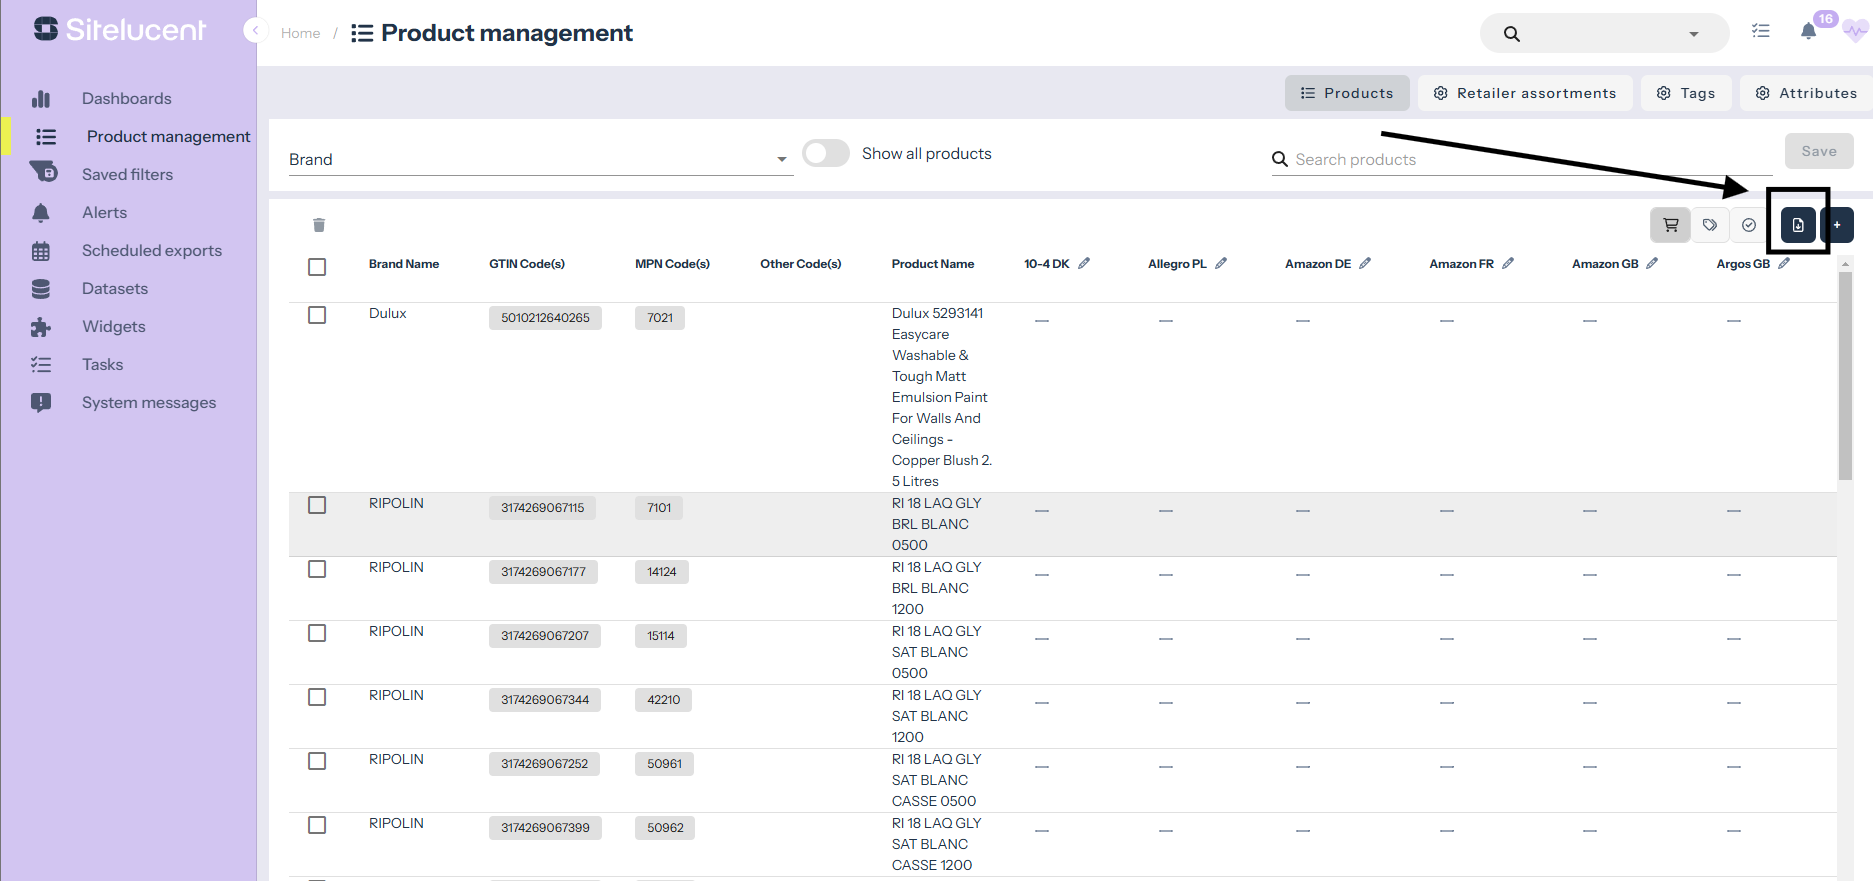
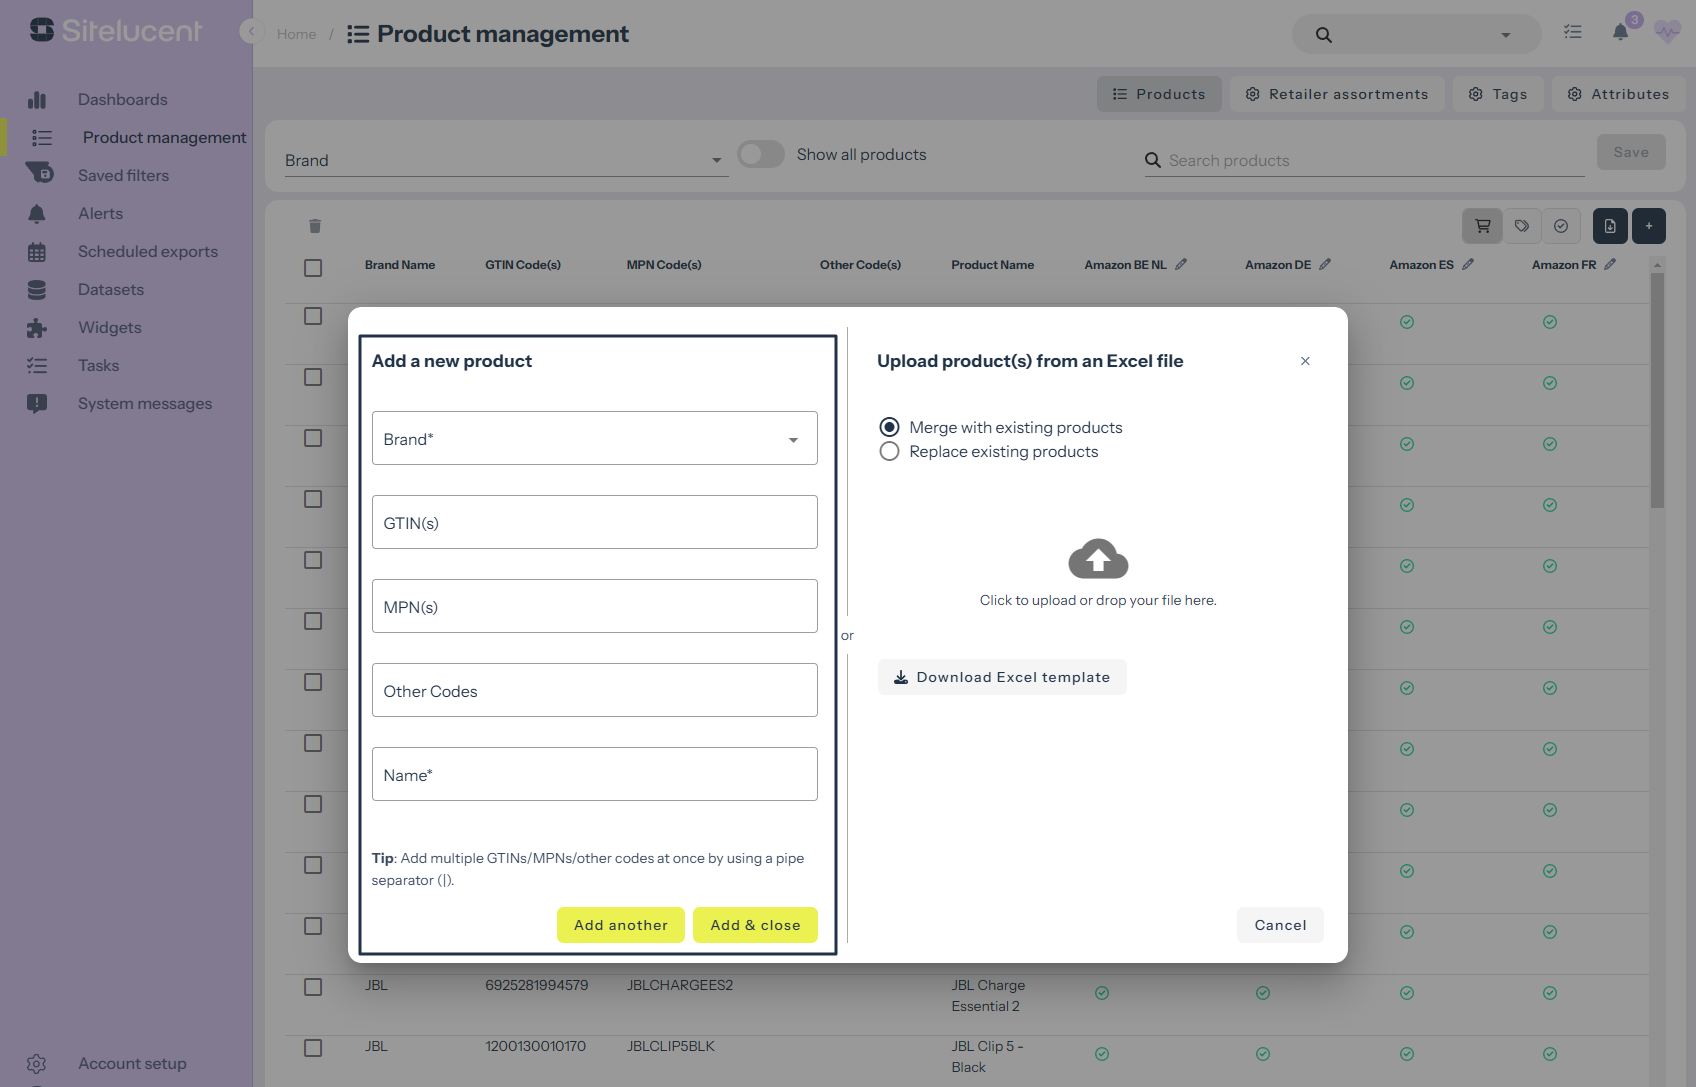
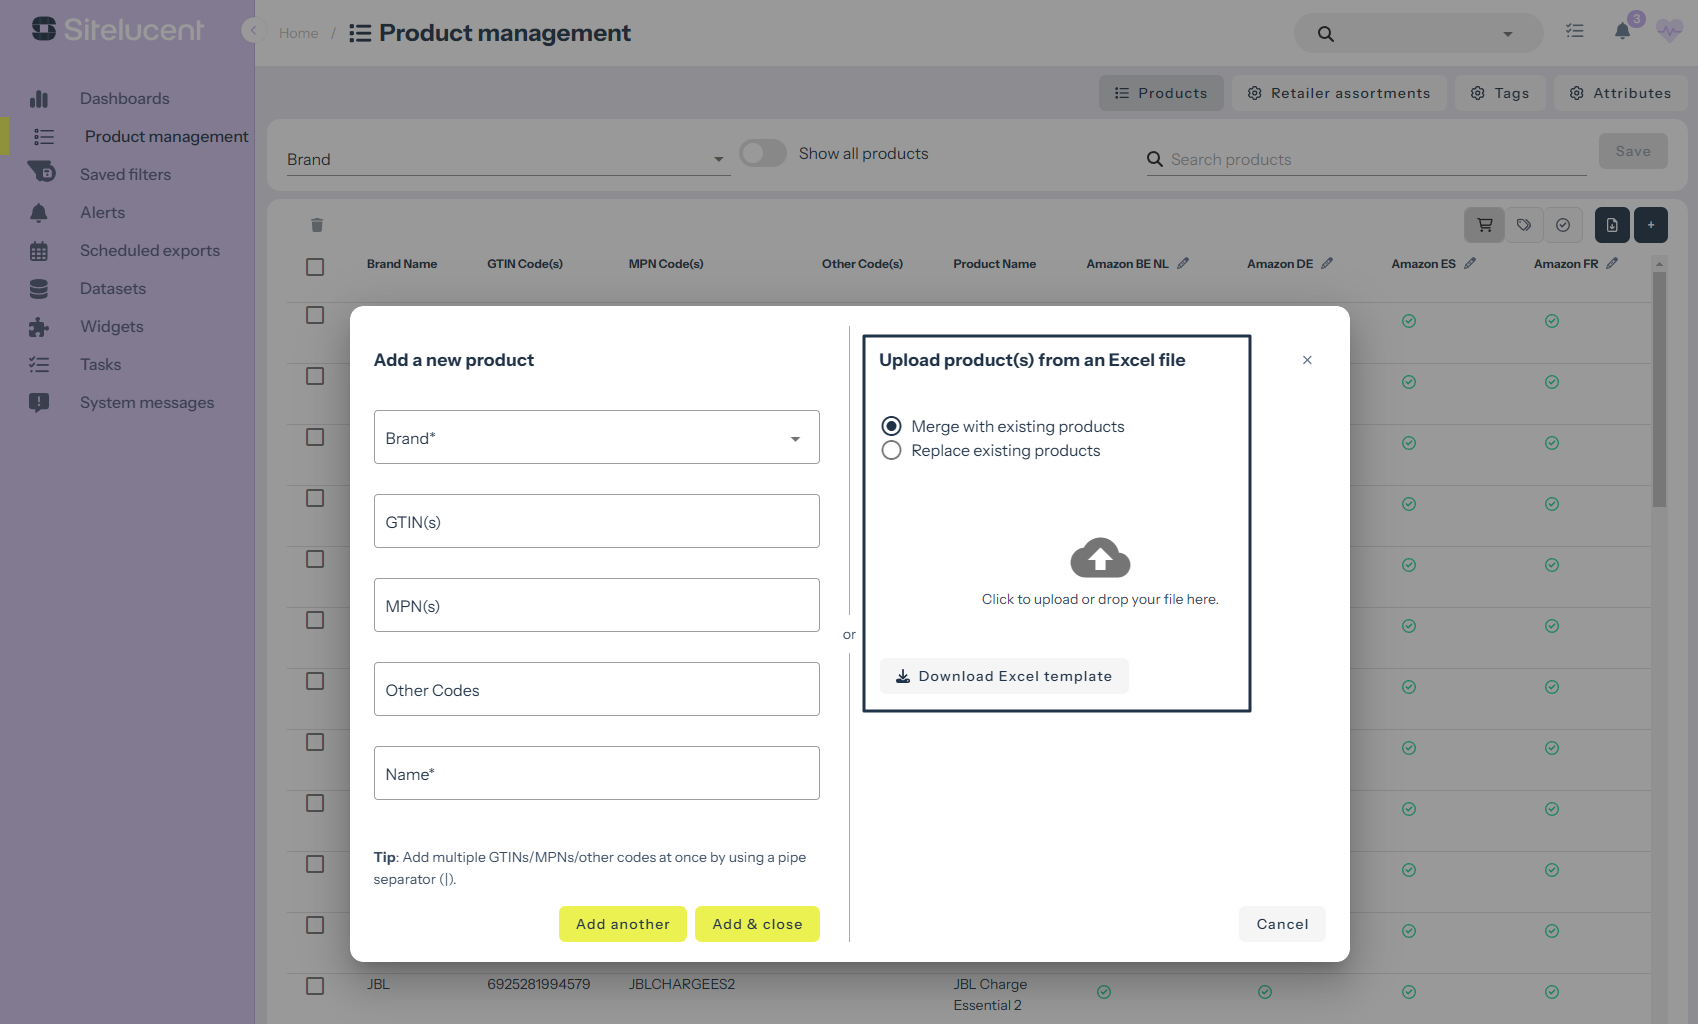
When you click on the plus (+) icon located on the right side of the interface, it opens a pop-up that allows you to add product(s). You have two options:
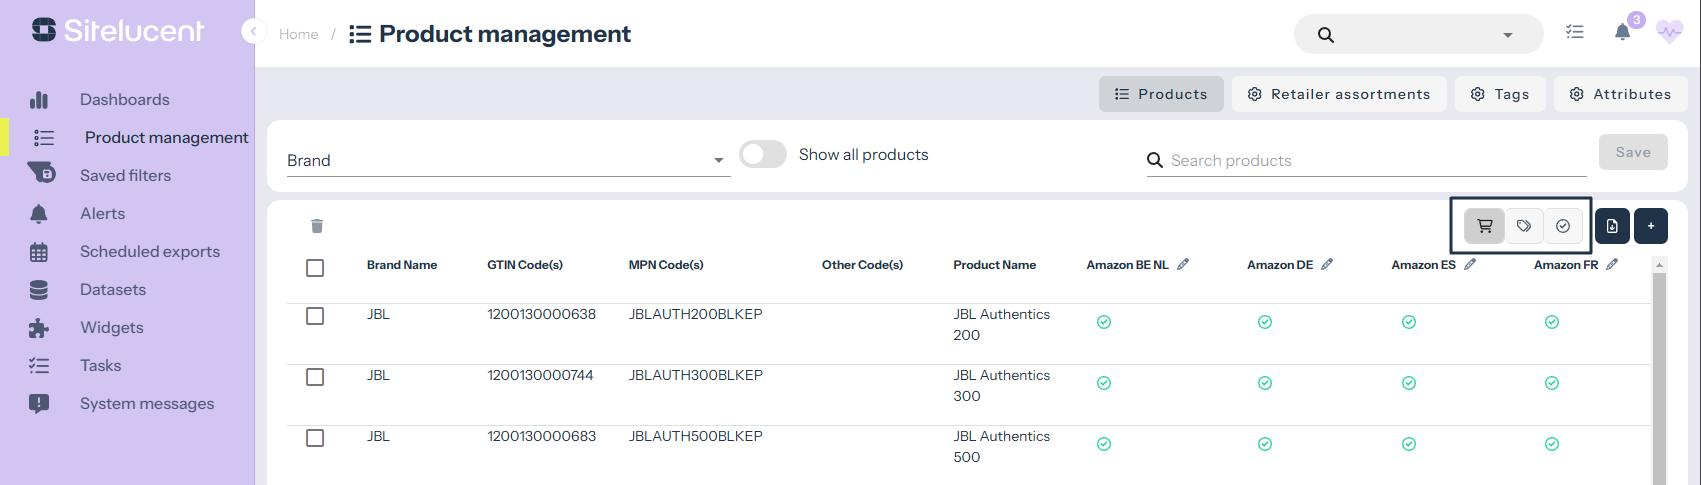
The three tabs help you easily switch between retailer assortments, tags and attributes. This functionality allows you to add or delete values for your products quickly.
If you wish to delete (a selection of) your product(s), you can do so directly within the interface. If your happy with the selection of products, then click on the box seen in left corner (highlighted below). Pressing this button will select all products visible on the page (in the case below, a total of 50 will be selected). The number of the selected product(s) will always be shown between brackets.
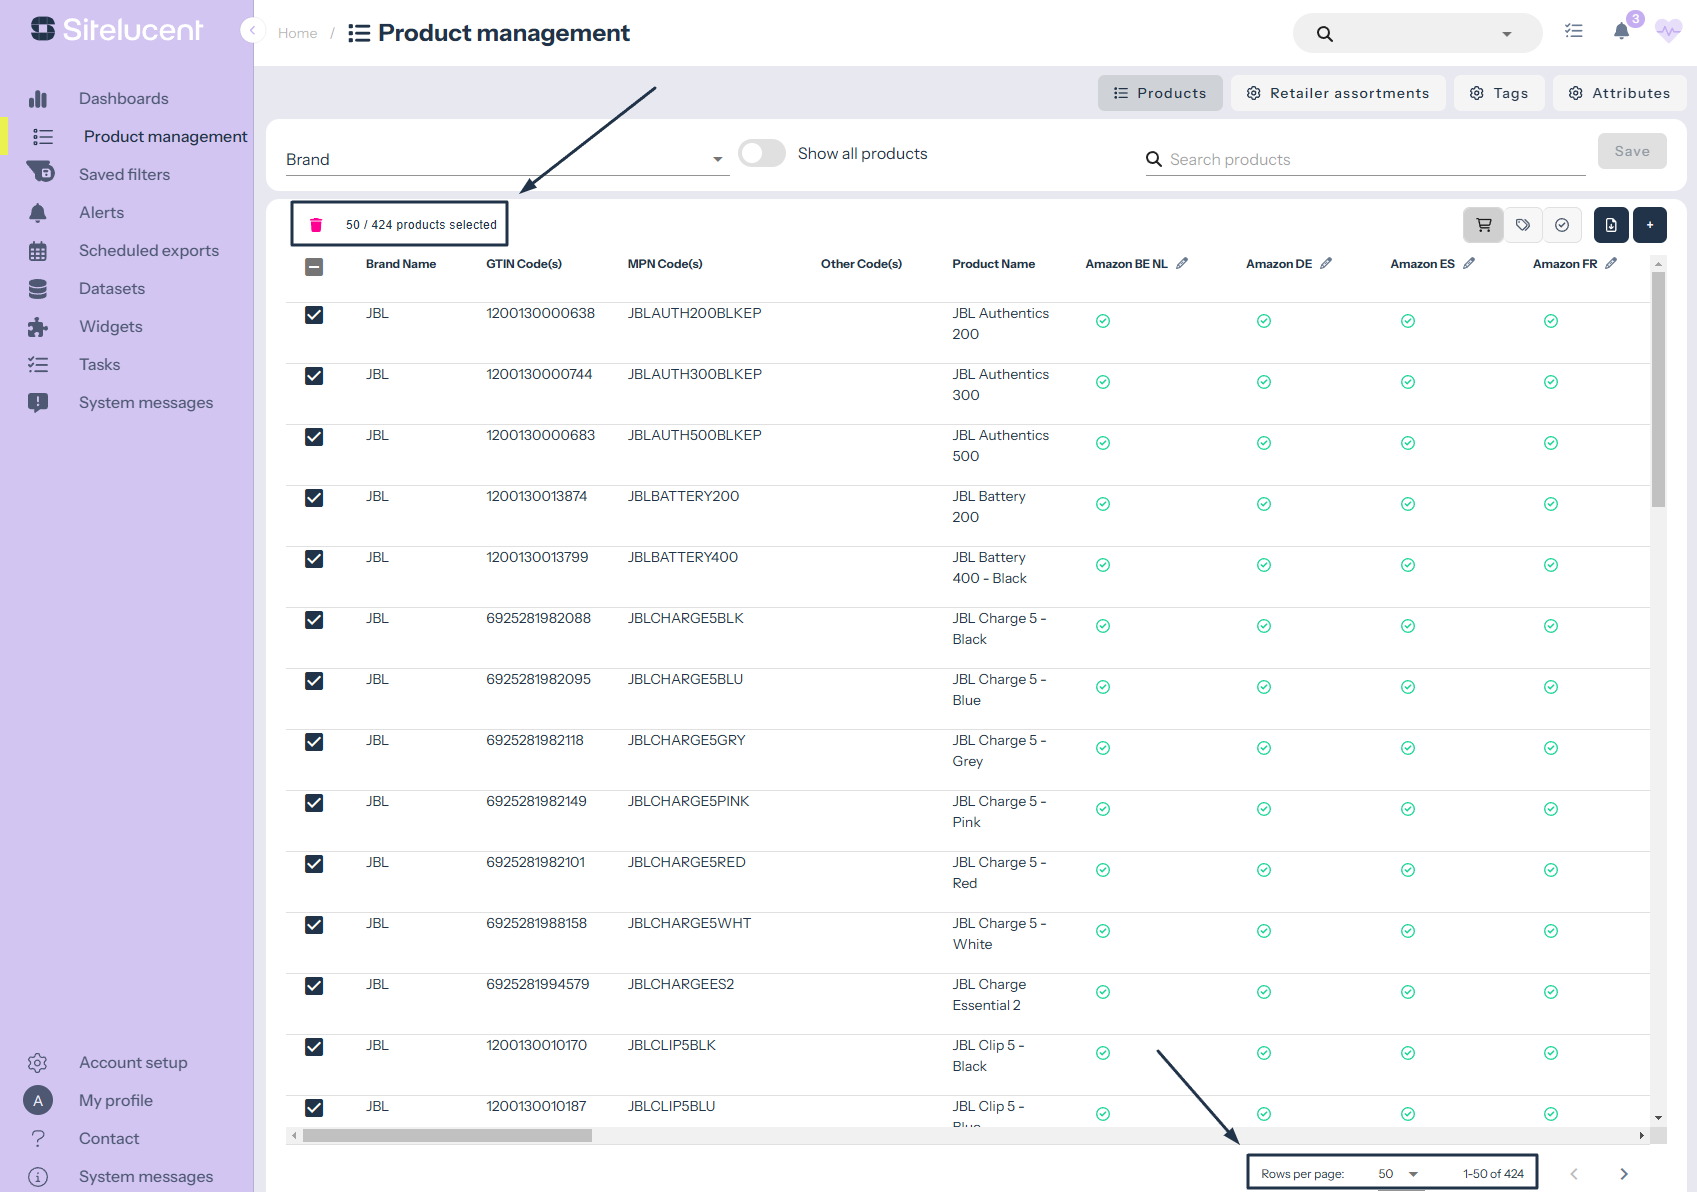
If you press the button again, you can delete all products. In the screenshot below, this action will lead into deleting 424 products.

Did you make a mistake? No worries—we’re all human.
If you want to add new information or improve existing content, you can inline edit by clicking on the field.
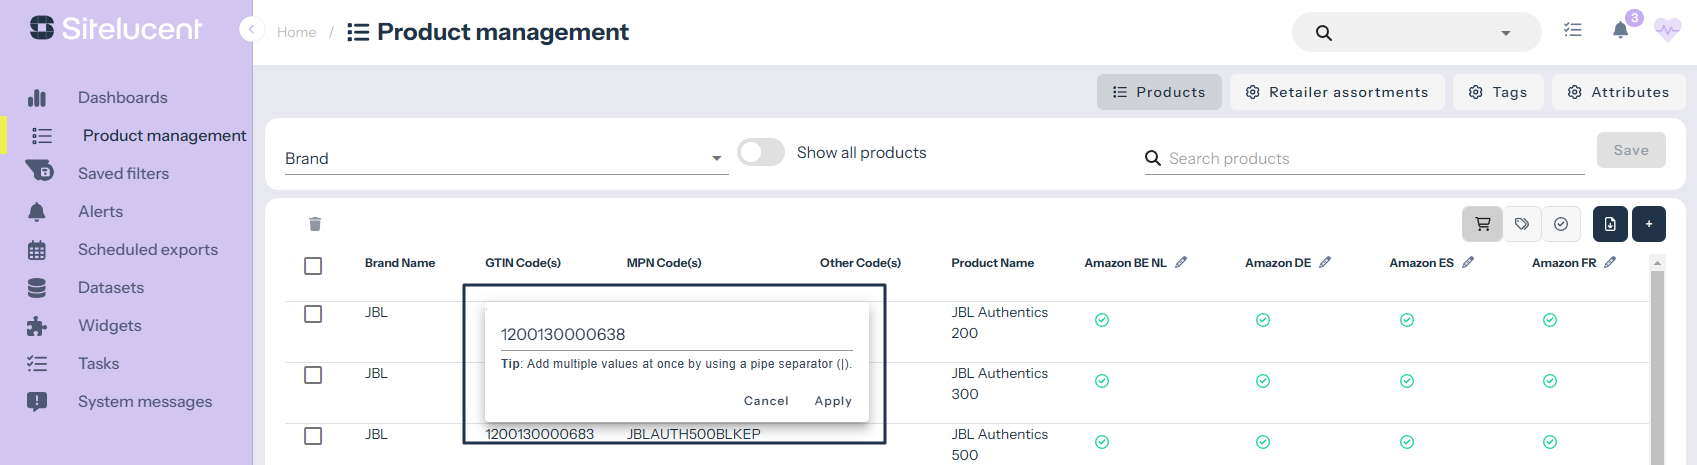
TIP: pipe-separate in case you want to add more values
After entering your input, click APPLY. If any issues are found, we’ll provide direct feedback. You can read about common issues in the Issues Resolver. If there are no direct issues, you’ll return to the Product Management screen, where you’ll need to decide whether to save your progress again.
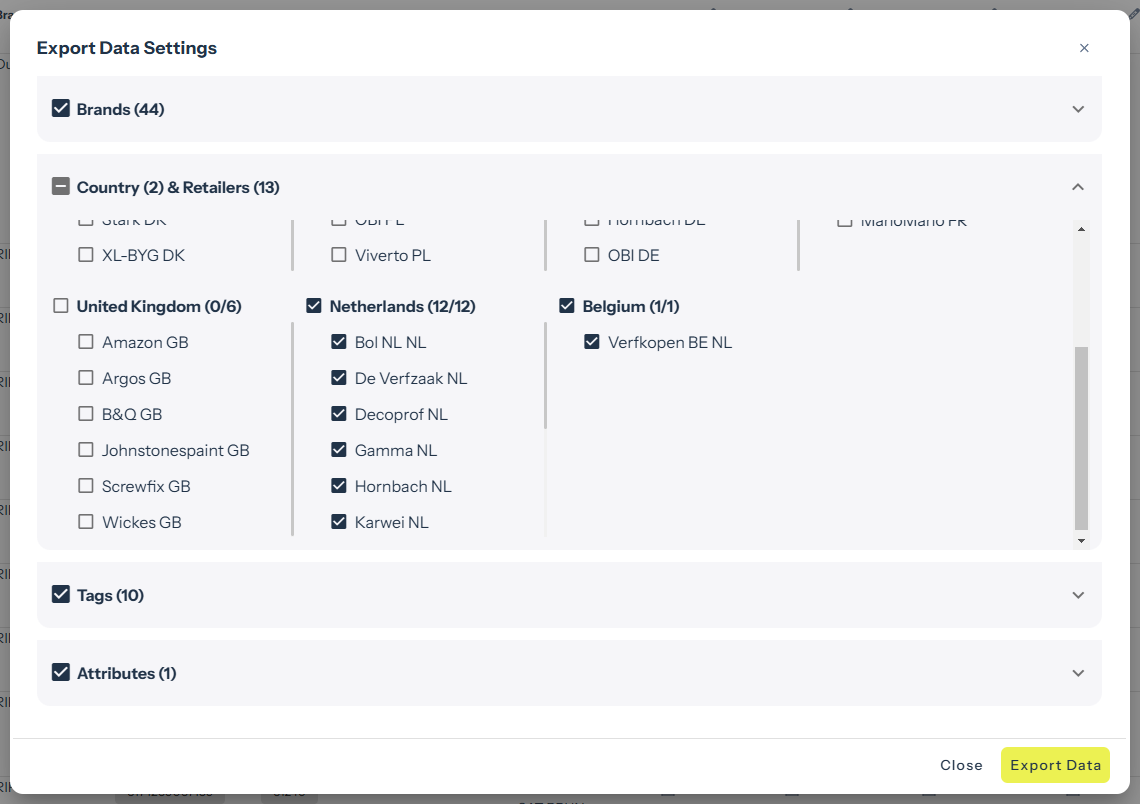
Users managing large or diverse accounts (many retailers, countries, tags and attributes) likely need to update product assortments, tags, attributes based on current Product Management information. Typically these accounts are maintained by several users responsible for parts of the account (e.g. specific countries or retailers). We allow you to filter and select specific data before downloading, to make the process to update your product assortment faster and more efficient.