What can you find in this article:
Tags provide contextual information for products, such as their product category, introduction month, range, and type. For example, a tag can represent “Product Category” and be labelled with values like “UHD Televisions.”
Tags serve two primary purposes within Sitelucent:
Filtering: tags act as filters related to dashboards, alerts, and other features.
Attributes can be used in the DCC score configuration to, for example, check whether the colour, size, or keyword is part of the appropriate content elements, like the product’s (sub)title, description, specs table, etc.
Retailer Assortments are associations that indicate where we expect to find a product—specifically on which channels or retailers. These assortments allow customers to focus on the most critical products per retailer. When the Listing Completeness score reaches 100%, it means all the products in that retailer’s assortment are accounted for in our dataset.
Information about how to manage tags and attributes will be combined since their actions are identical. If there are any differences between the two, we’ll explicitly mention them.
Tags, attributes, and (Retailer) Assortments must be managed since products and their relations change over time. You can do this in the interface or directly upload it via Excel.
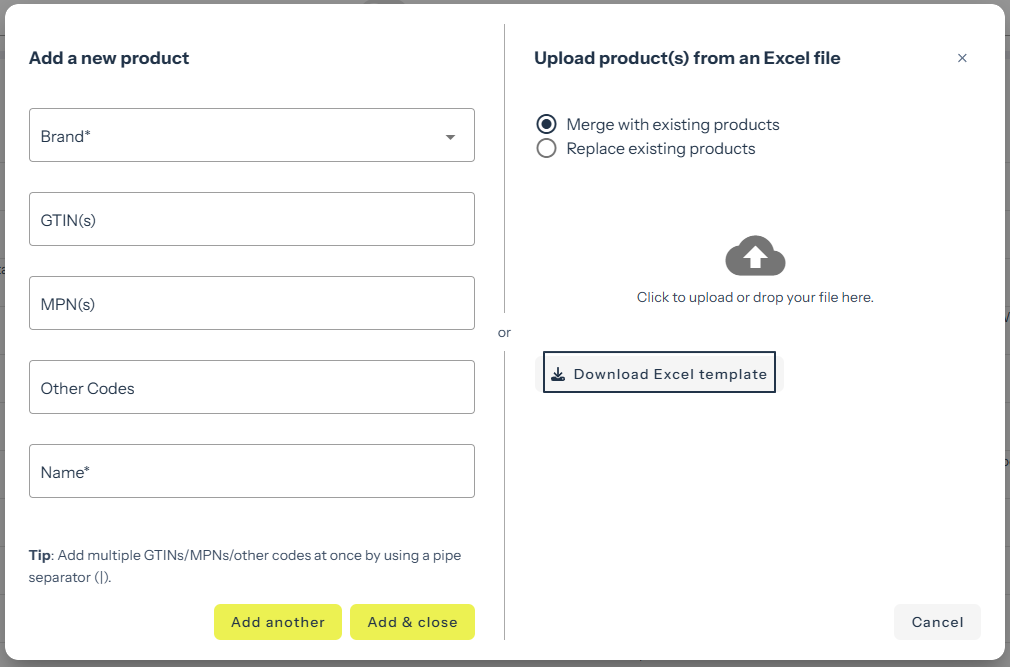
When preparing an Excel file for upload, you likely include retailer assortments, tags, and/or attributes per product. This can easily be done by adding column headers and values next to the first 5 mandatory columns. After these columns, you can decide yourself if you want to add tags, attributes, or retailers. There is no dedicated order for tags and attributes, and no restriction on the maximum number of columns.
Now, for us to know if you added a tag, an attribute or a retailer assortment, you can include the following codes:
If you add column headers without codes, we will ask you once to map the columns to the correct bucket directly after you uploaded the file.
Not sure which retailer ID you need to use? Then download the template, it will provide you with the needed IDs. The template can also be downloaded directly in your account:
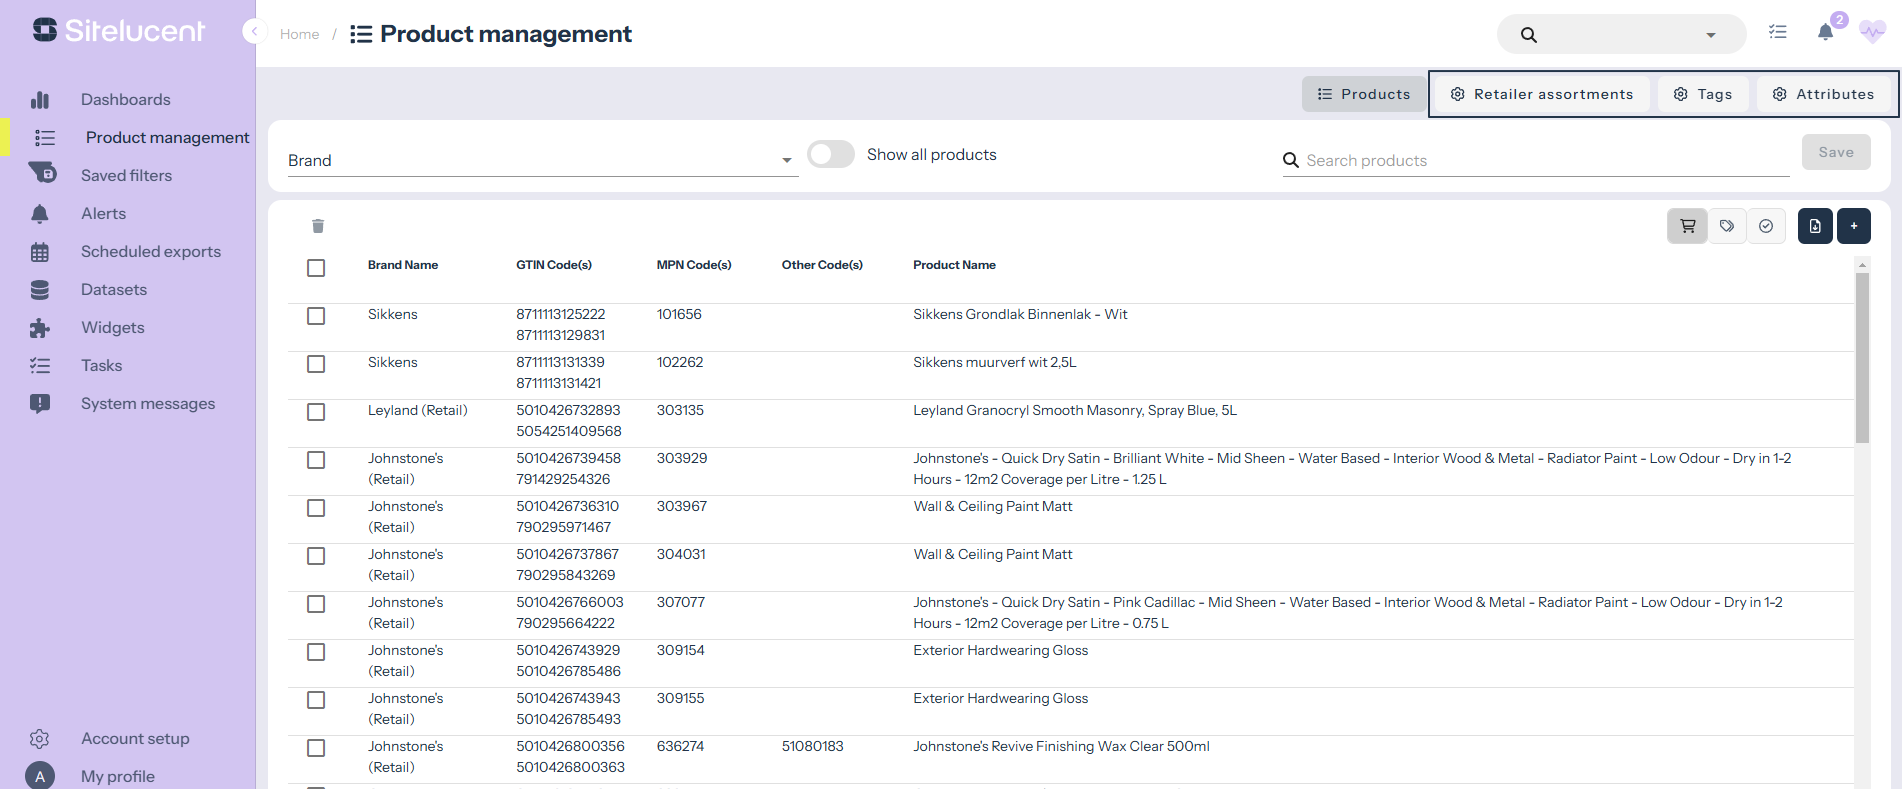
Below, you’ll find information about the three tabs displaying retailer assortments, tags, and attributes associated with your product(s). You can easily manage these elements directly through the interface.
By default, all retailers connected to your account will be visible, displayed side by side.

Per retailer, you can decide whether a product should be listed (✅) or not (-). To make this choice, simply click the column once or twice (to undo). 
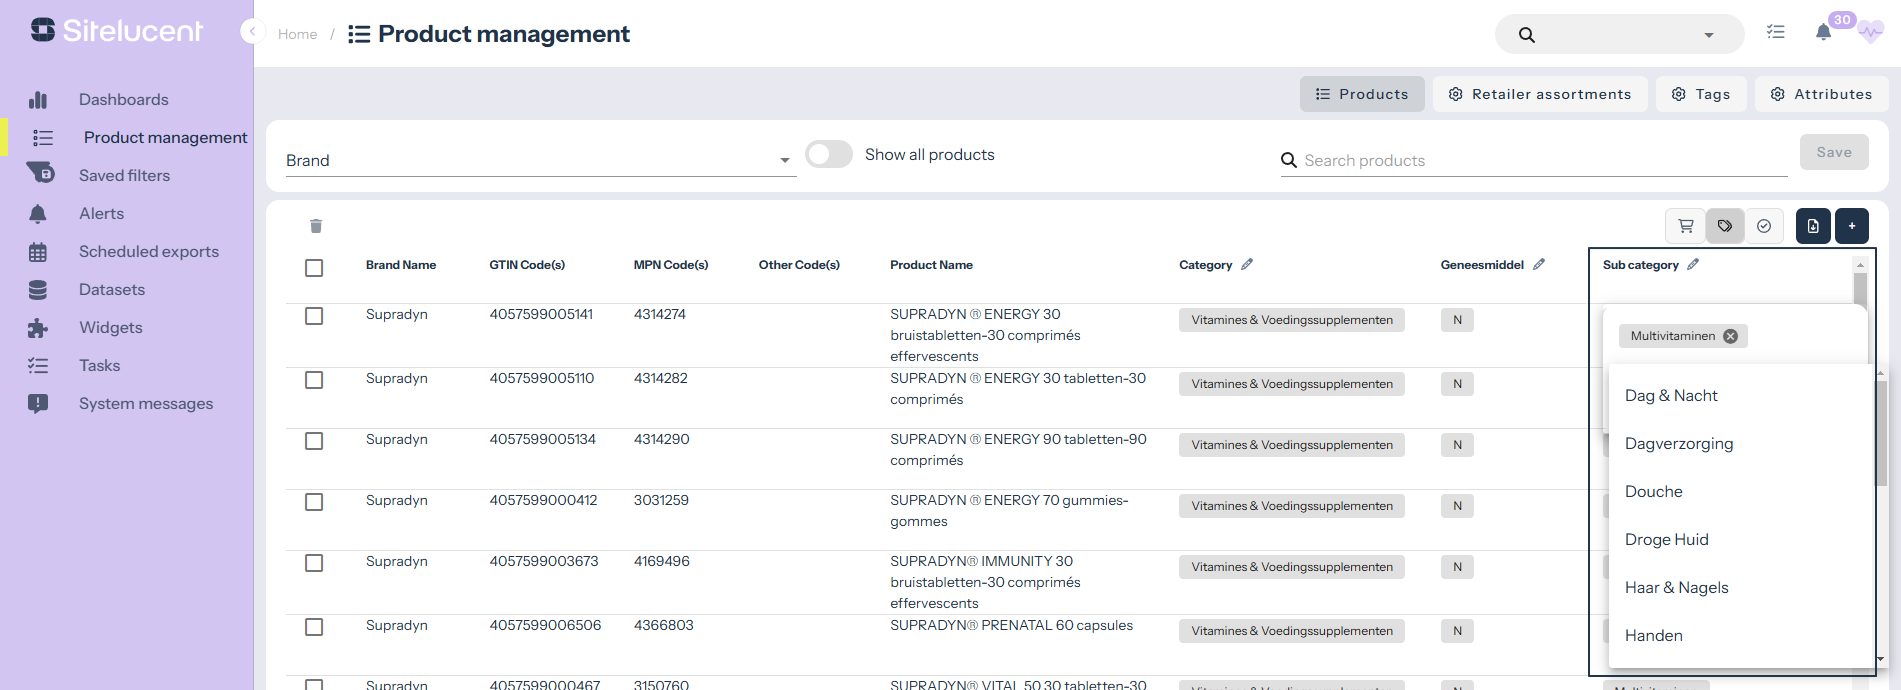
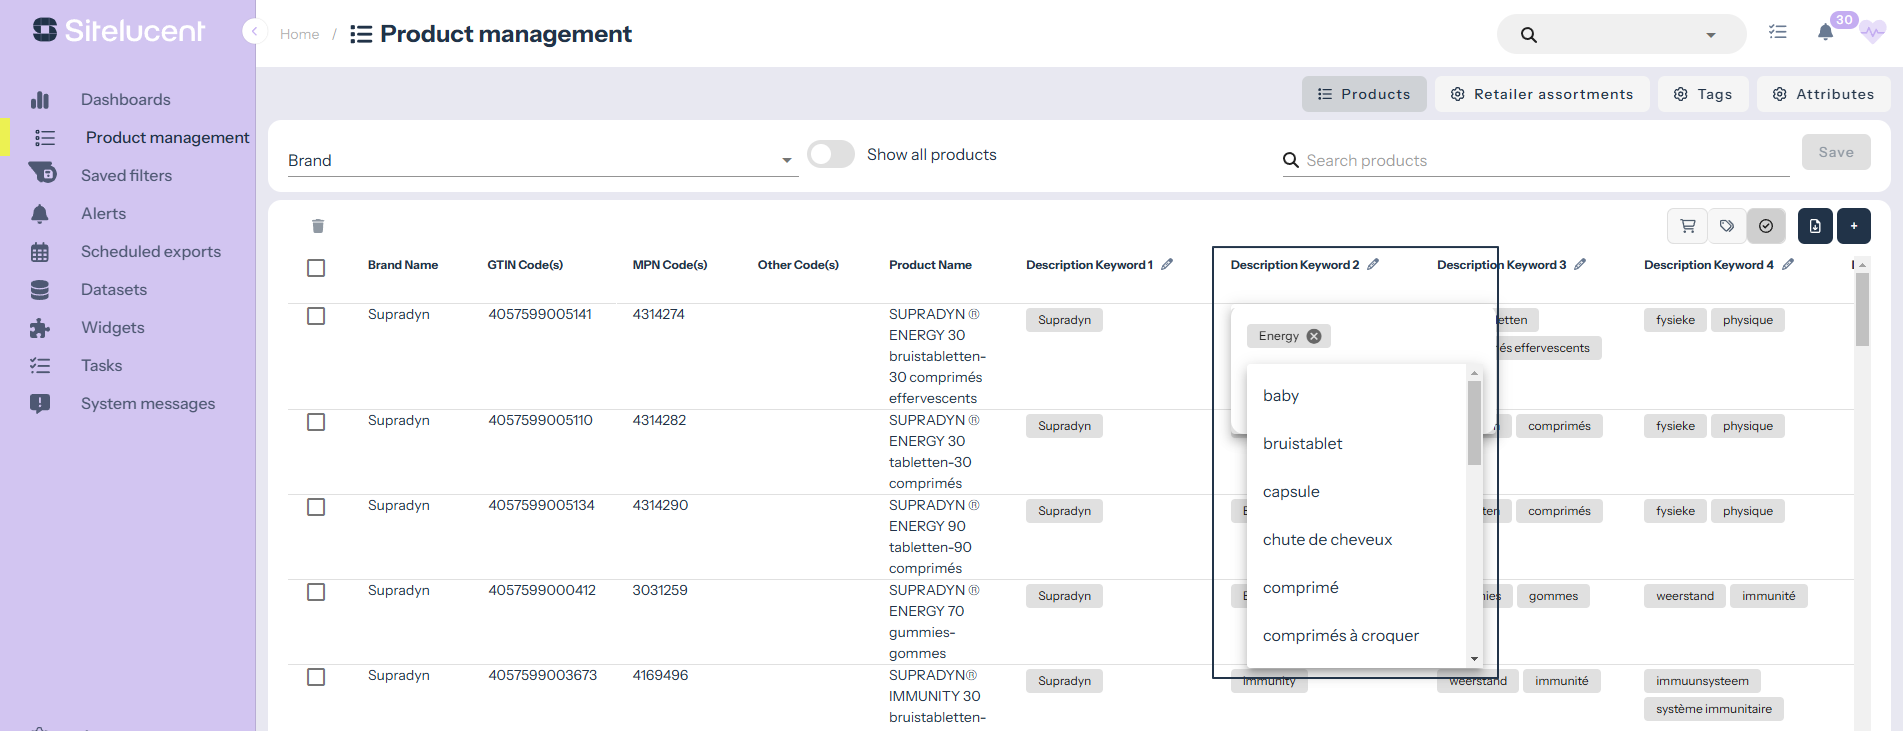
Per product, you can easily manage tags through the interface. If you’ve already entered any tag(s), their values will be displayed as follows:

You can update or delete tag values by clicking on the specific column:
This action can also be done in bulk. The Manage Product Associations section will tell you more about this. You can find this section later in this article.
This section is very likely to the second tab (tags). In this tab, you can update attributes for products by selecting specific field and choosing from available values in the pop-up shown. You can also perform bulk updates.
Please note that the section below provides an overview of managing tags. Since the managing attributes is almost identical, follow the same steps as described below. Manage tags and attributes can be selected via the interface:

1. Manage tags Overview:

This screen displays all Labels, their corresponding Value(s), and the number of Associated Products. In the above screenshot, we took the tag Label: Competitor, which has 2 values (Y/N)
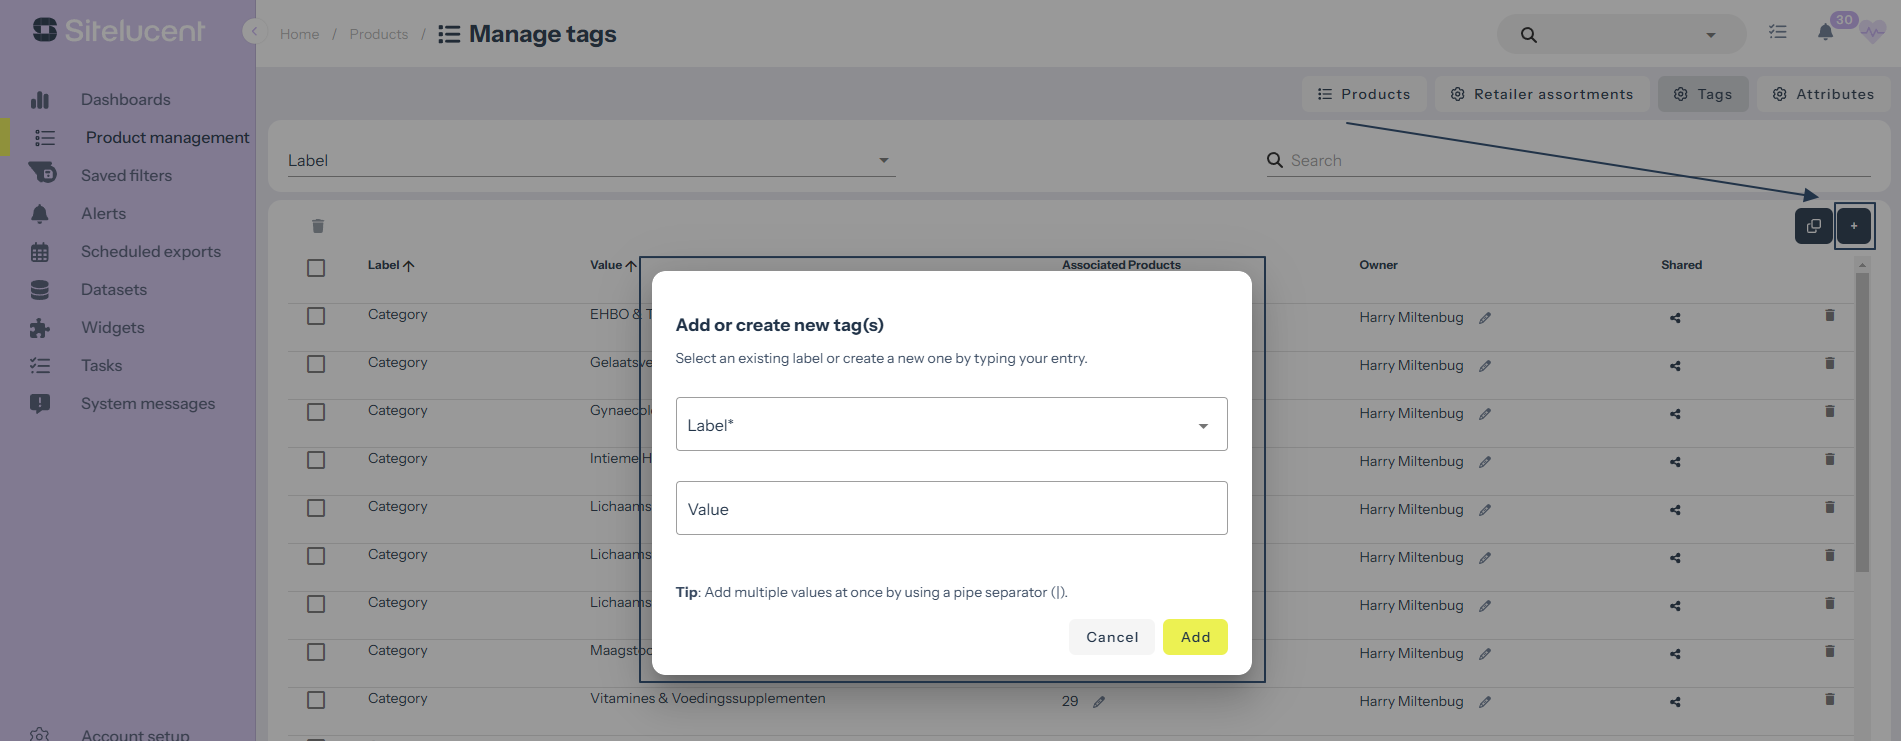
To add new tags, click on the plus (+) icon in the upper-right corner. A dialogue box will appear with input fields for Label and Value, along with the “CANCEL” and “ADD” buttons.
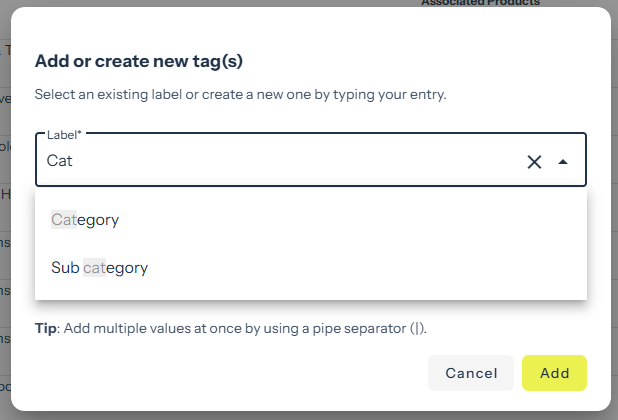
The Label field offers auto-complete suggestions based on existing Labels.
Deleting tags can be done individually using the waste bin icon at the end of each row or collectively via multi-select checkboxes.

2. Manage Product Associations:
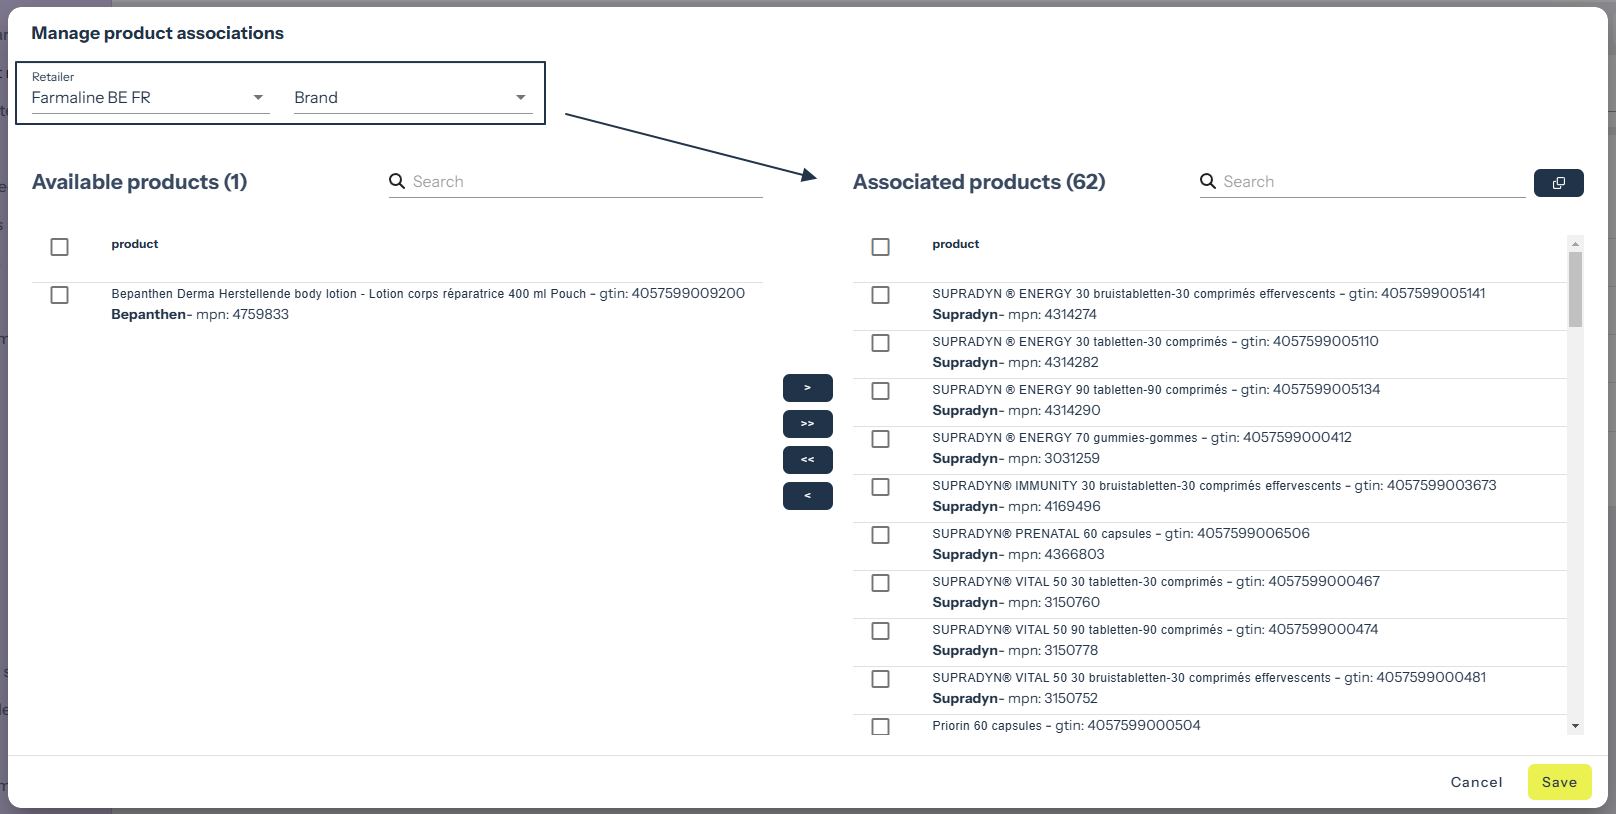
Click the edit icon (pencil) next to the value in the ASSOCIATED PRODUCTS column to open the “Manage Product Associations” screen

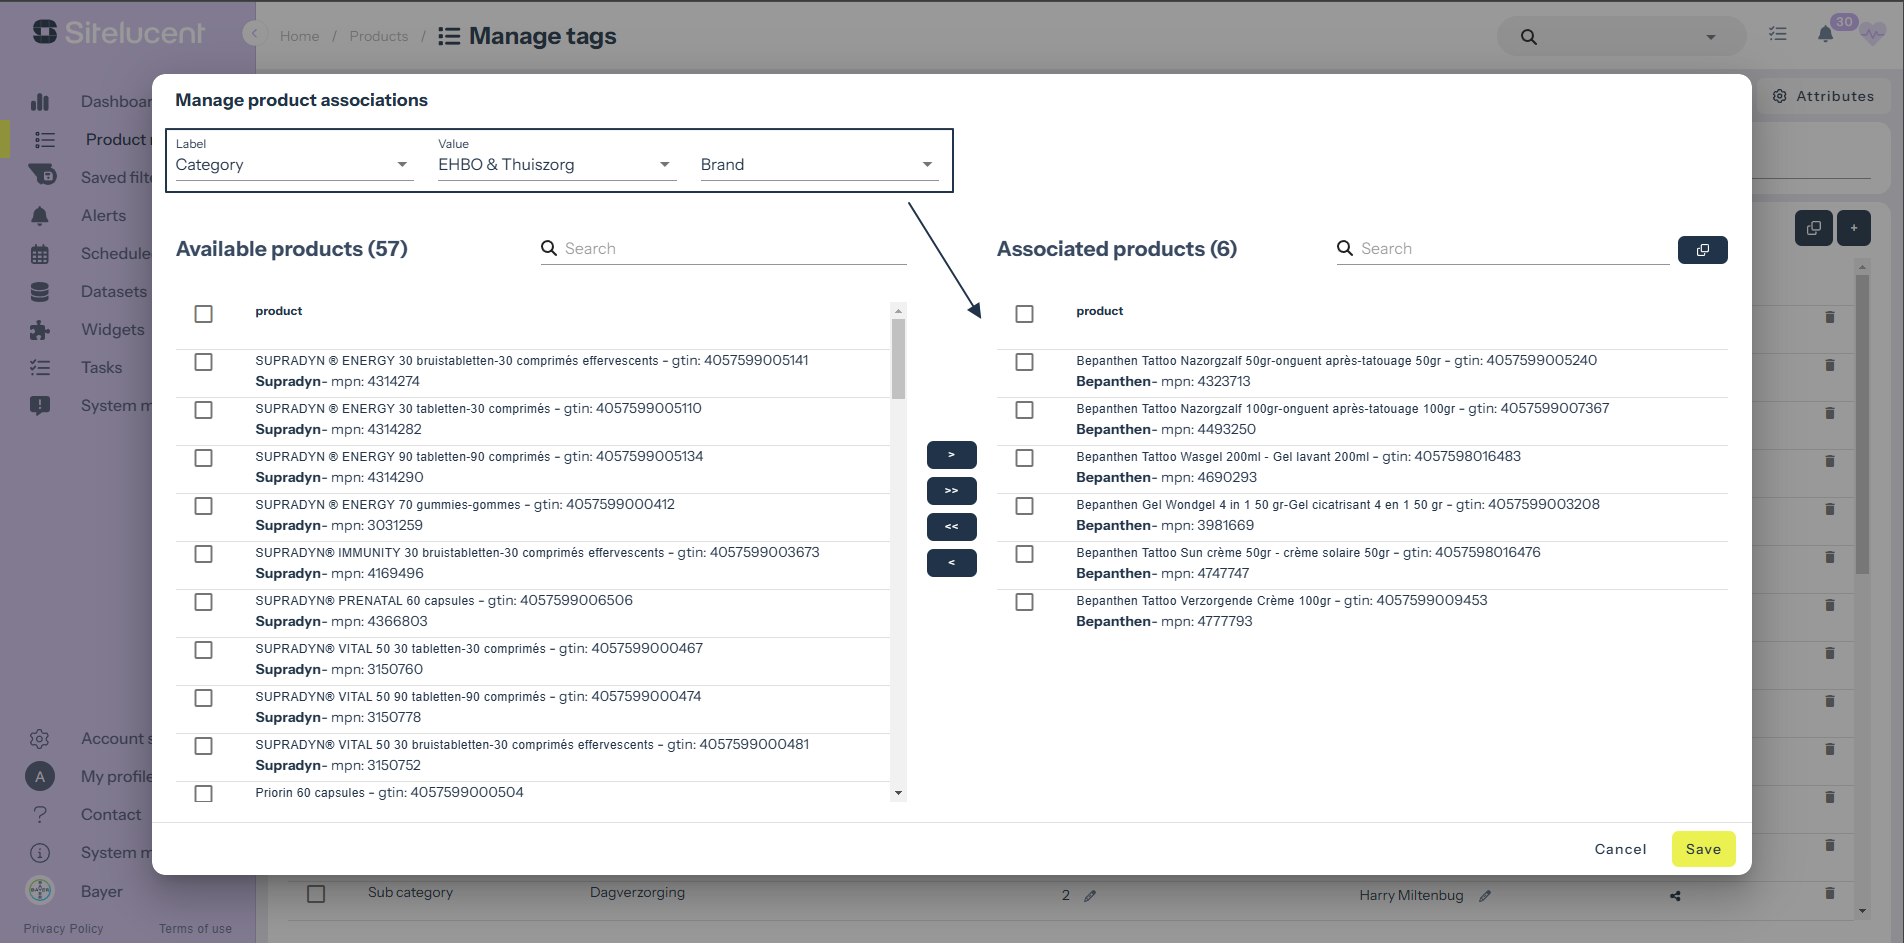
Depending on which pencil icon you pressed, the specific label and value will show by deafult on the top left corner of the pencil. The number of associated products should match the previous screen.
On the left side, you see all available products that you can associate with the Label and Value you selected in the previous step.
In addition, a user can choose to narrow down the selection by using the brand filter at the top (which affects both areas with products) and/or by using the search-field above each individual area. See below example where we bring down the available products by selecting a Brand (Arla) + Search (bio) combo:
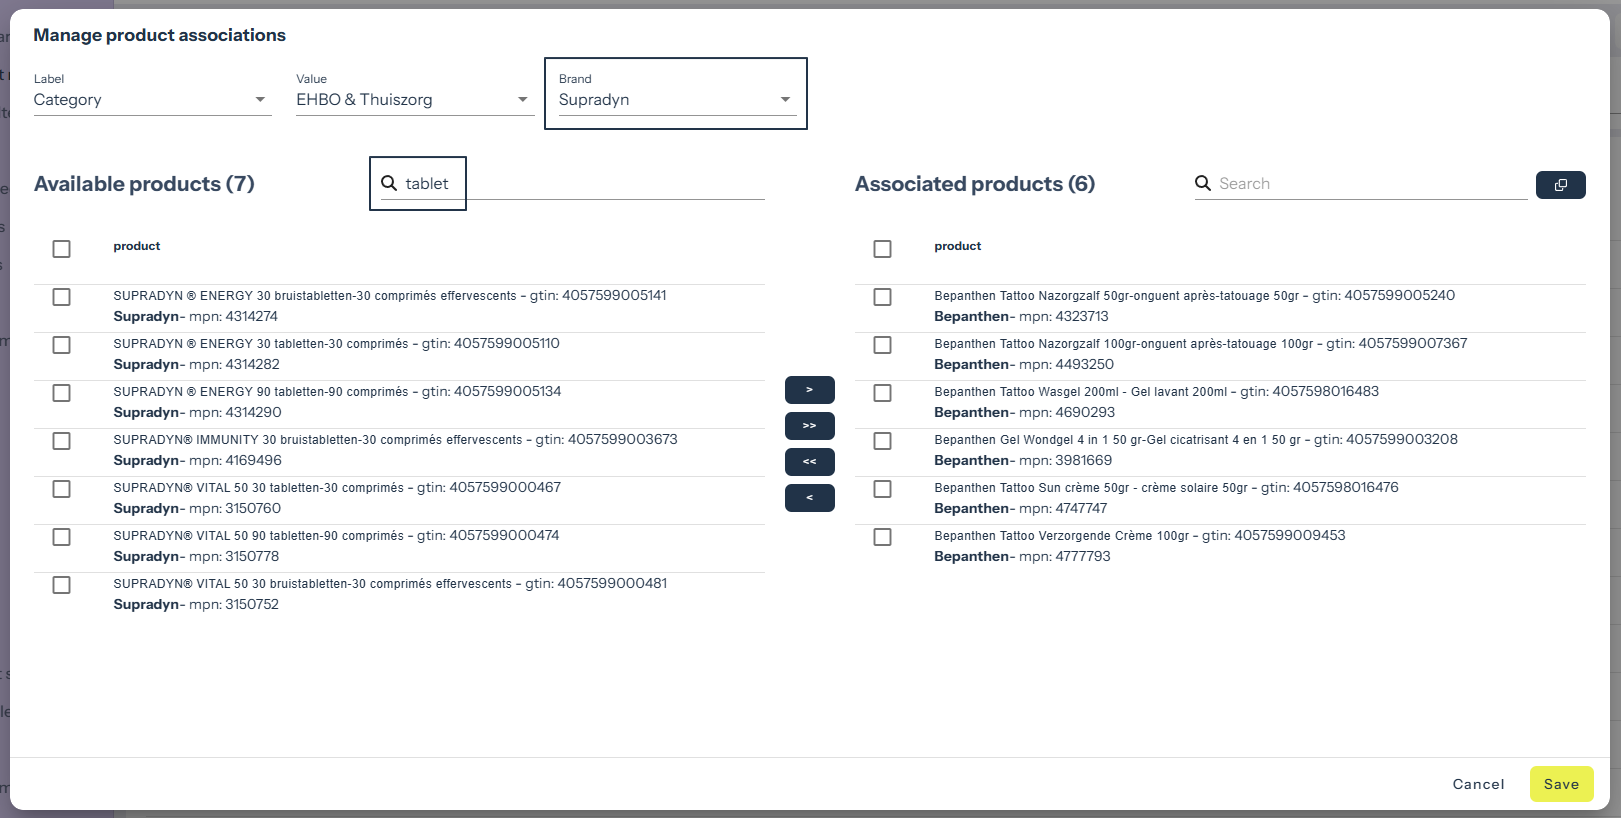
You can multi-select products in both of the shown areas. Between the two areas with products, a couple of buttons are shown. From top to bottom, these are:
Move selected product(s) from left to right (“>”).
Move all product(s) from left to right (“>>”).
Move all product(s) from right to left (“<<”).
Move selected product(s) from right to left (“<”).
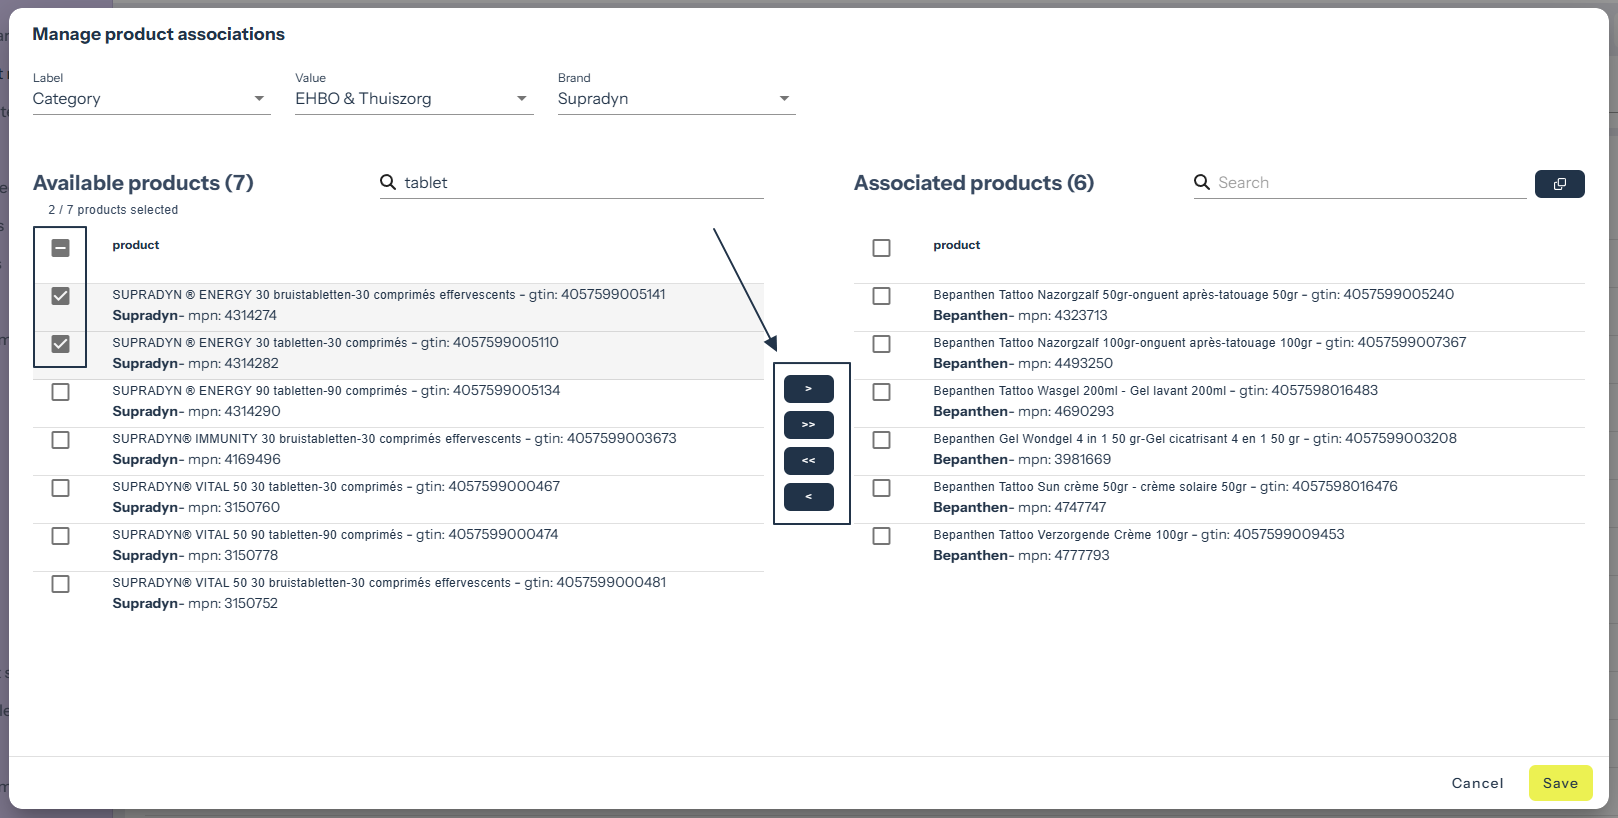
3. Copy the entire set of associated products to another tag
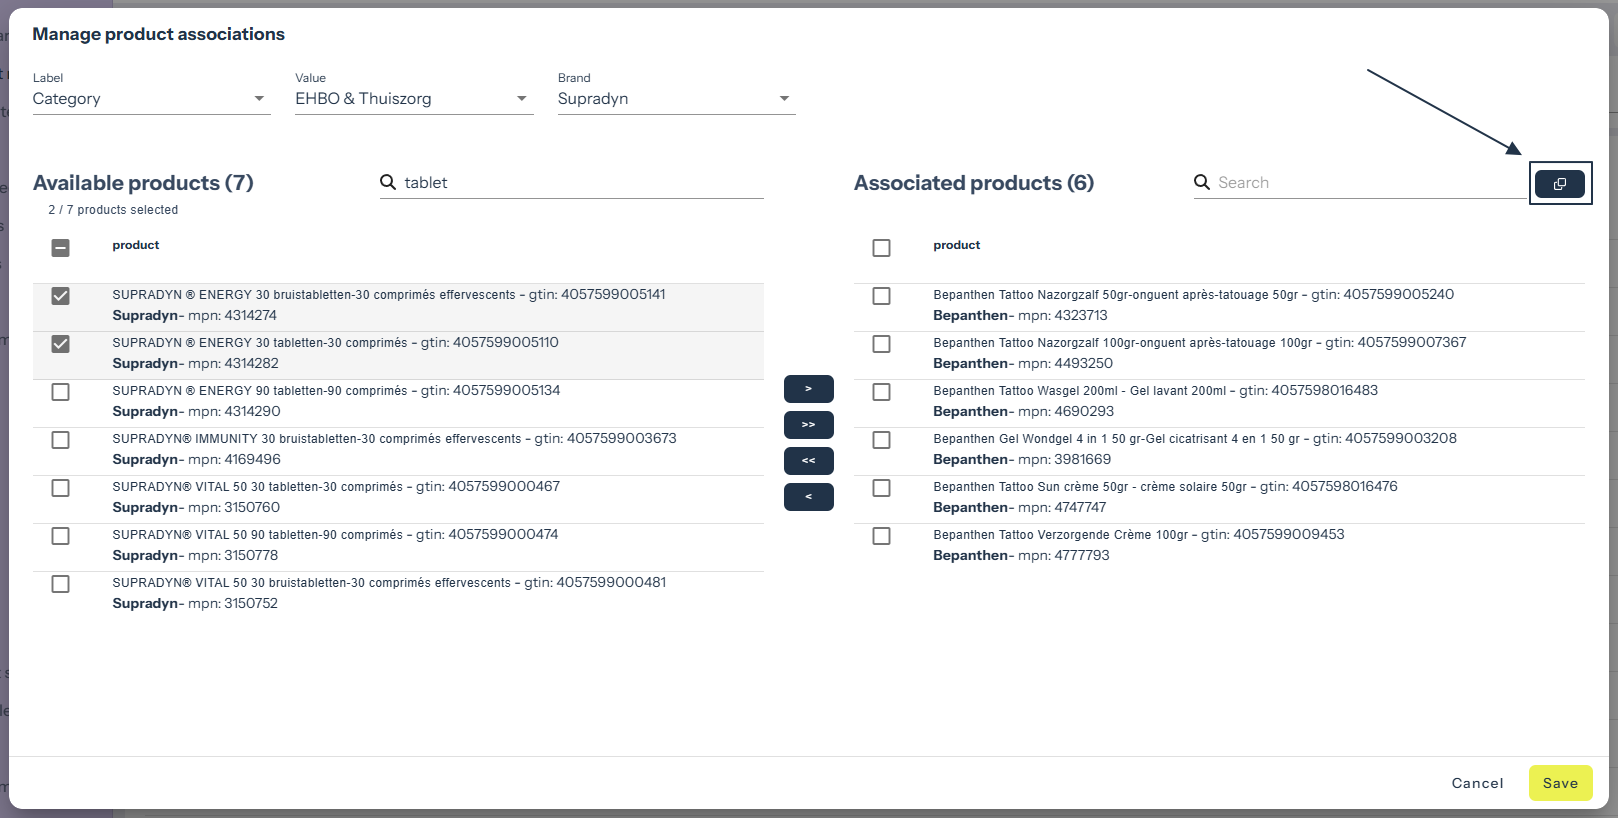
You’ll find a “copy” button in the upper-right corner of the screen. This button allows you to copy the entire set of associated products to another tag. Here’s how it works:
From and To tags:
Select the “From” and “To” Tags. By default it uses the Label and Value of the tag you selected at first, by pressing the pencil icon.
Select the tag Label and Value you want to copy the product To.
The number of Products to be copied is displayed at the right side.
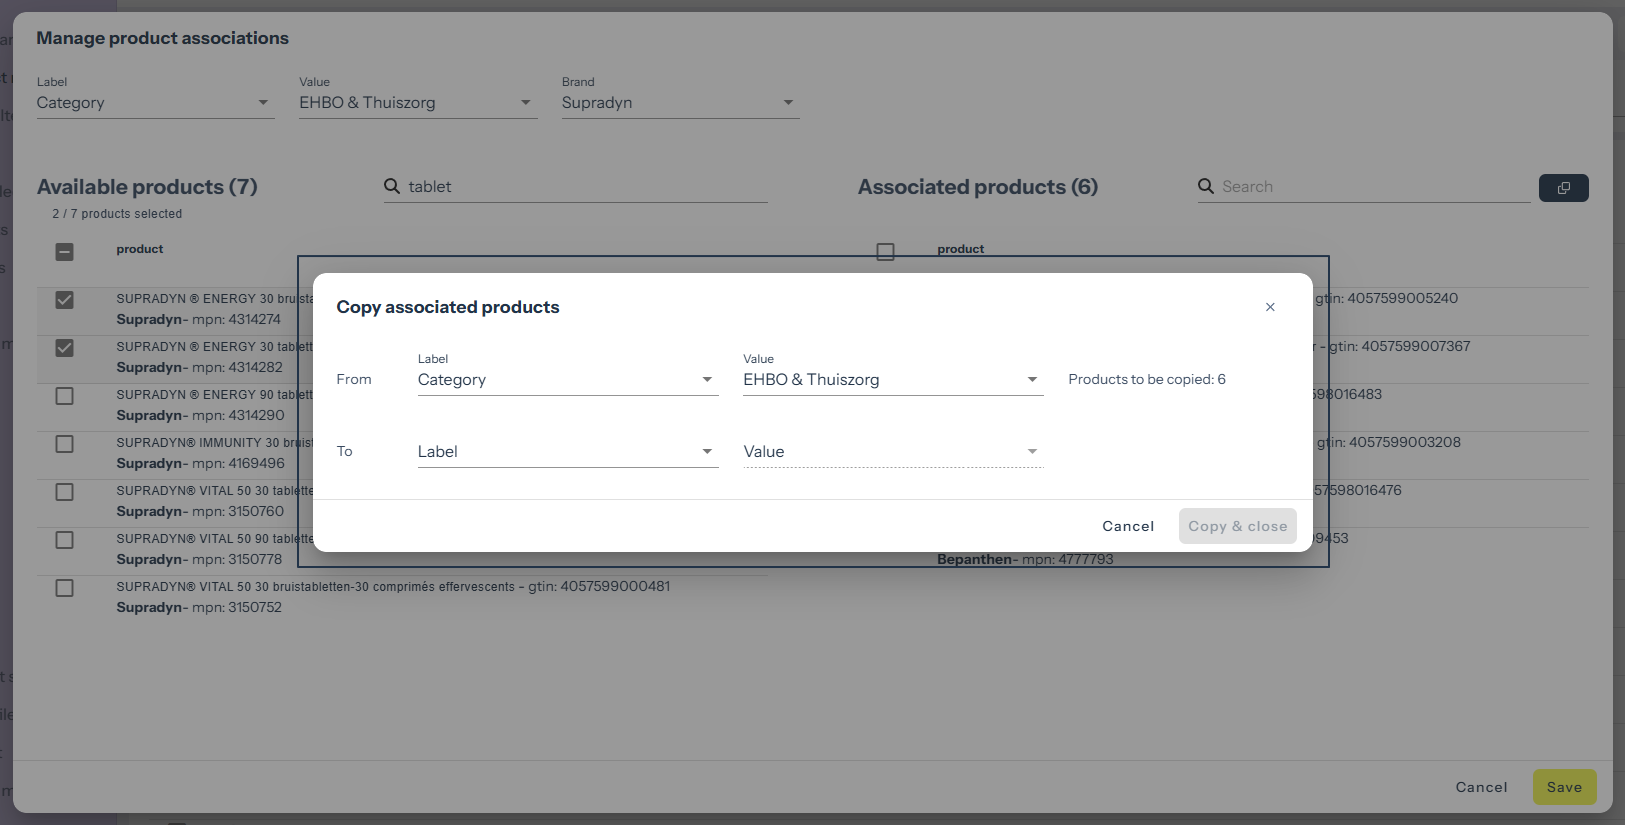
Copying Options:
As seen on the screenshot above, we give 2 options for How should we copy these products?
Merge with existing products: Adds products from the “From” to the “To” if they don’t already exist in the “To,” without affecting other existing associations.
Replace existing products: Deletes existing associations for the “To” and adds all products associated with the “From.”
Lastly, you can choose to
Press the [x] at the right top corner to close the pop-up. This closes the screen without performing any action.
Copy & Stay button: Performs the copy and clears the “To” form fields, allowing another copy.
Copy & Close button: Performs the copy and returns to the previous screen.
The Manage Retailer Assortments is very likely to the Manage Tags & Attributes screen. There are a few differences though! We will list them below:
Displays a list of retailers connected to your account.
Shows retailer ID, Country, (Display) Name, and the number of Associated Products.
The ability to sort by Country and by Name.

Filter Options:
Country: Allows users to select one or more countries from the list (based on retailers present in the account).
Search Bar: Enables text-based search on Country, Name, and ID.
Edit Icon:
Next to the “Associated Products” value, there’s an edit icon (pencil).
Clicking it takes the user to the “Manage Product Associations” screen related to that Retailer Assortment
